Thursday, October 31, 2013

Halloween Totem Pole Cake and More!


This is a special Halloween blog post!  A very good friend of mine who happens to be an extremely talented writer has teamed up with me to put an eerie voice to the equally spooky cake I've conjured into existence...


Hallowee’en

by Adam McOmber

It gets dark early these days.  The sky turns the color of a bruise and, soon enough, the whole world fades to black.  We know we should get inside where it’s safe and warm.  Sit in the lamplight and read a book.  We should be cozied under a blanket and listen to the wind as it hammers against our windowpanes. 


But this is October.  Halloween weather and Halloween feelings.  And in these late days, we’ve grown to appreciate the dark, haven’t we?  We can feel it there inside of us.  Feel the crackle of autumn leaves in our chest.  The odd flicker of a jack-o-lantern’s candle. 


We like the way the hair on the back of our neck stands up when we see a fat spider hanging in a web.  We appreciate our hearts beating a little faster when we walk down an empty street and hear something scuttling in the bushes.  It’s a reminder of the season.  A reminder that the green of summer is fading all around us—and there’s a certain pleasure in watching that life pass.  The end of the green is what reveals the dark, after all.  


And in the dark, there’s a whole world of imagination.  Watch it play like a film on the white screen inside our mind.  A projector bulb flickers to life and then suddenly a black and white horror movie appears.  The dead are rising.  The monsters are coming out.  We watch the mummy drag itself from a jeweled sarcophagus.  Its face is all bandaged, and its flesh looks like desert sand.  We watch zombies rot and stumble through a graveyard.  And there too, in the eldritch vapors, is Victor Frankenstein’s monster, perpetually questioning his own humanity.  


 And behind him, a common man who’s growing tufts of animal hair from his face.  Yellow eyed, long fanged wolf wearing shredded clothes, prowling the shadows.  They’re like old friends now, aren’t they?  And we walk with our monsters in the dark.  We forget our lives and our responsibilities for a while.  We feel the strange old desires well up in us.  We too are creatures from long ago.  And we spread fear through our little town.  We realize that tomorrow the sun will rise, sweeping all of this away.  But for now we have the dark.  And we love it, don’t we?  We love it just as it is.


Thursday, October 24, 2013

Apple Pie Contest


 Apple Pie.  It's my favorite type of pie  Always has been.  Probably always will be.


For the second year I entered the Bucktown Apple Pie Contest.  Last year I tried to make a dulce de leche type crust AND a dulce de leche like filling.

Thanks to my nephew for being an excellent hand model
It was kind of a failure.  It looked great but tasted bland.  My idea totally bombed and I think in the end I was just shooting too big with the little pie making experience I had.  So I had intended to make a much simpler apple pie this year.  Until--of course--I read another bloggers post about a local pie shops apple pie with a vanilla-like custard and I was like.....mmm...damn...  So I had to try this.


I ended up adapting it a tad and actually combined it with another recipe from my Cook's Illustrated cookbook.  The main adaptation was that the pie contest requires a double crust and the original recipe had a crumb topping (which is my favorite because I actually don't really like double crusts that much).  Nevertheless, I had to abide by the rules.  I was a little nervous about creating a hybrid pie for this contest based on my past experimental pie making failure but I made a test pie first and it was damn fine.  Thus, I went with it.

See? There's a little sticker that says 'Semi-Finalist'!  Also, yes my pies name was Brunhilde, the female warrior.

And it paid off because I was a semi-finalist in the contest!  I think there were about 100 entries and I was one of 15-20 semi-finalists so I was very pleased with my progress.  I don't even care about the failed art-deco"esque" design I had worked out for the top crust that caused me to frantically start cutting out free-hand maple leaves with leftover pie dough and plopping them atop my mucked up design...  All that is water under the bridge because I made it to the semi-finals!!!!  I made a pie that was on the track to becoming an award winning pie!  It just boosts my confidence a bit so I am excited for next year now.


Recipes:

For the pie crust, I again used the one for my stone fruit pie post times and doubled it for two pies.

The first part of the hybrid recipe came from here. As I mentioned before, I combined it with a recipe in my Cooks Illustrated cookbook.  The following is my complete version and is only for one pie.

Apple Mixture

7 granny smith apples (I didn't weigh them but they were large apples)
3 1/2 oz granulated sugar
1 3/4 oz light brown sugar
zest of half a lemon
1/4 tsp salt
1/4 tsp cinnamon

Custard

8 oz creme fraiche
1 large egg
1 tsp vanilla extract
1/8 tsp kosher salt
2 tbsp all-purpose flour

Egg Wash

1 tbsp heavy cream
1 large egg yolk

1.)  Peel, core and slice the apples into 1/4" slices
2.)  Toss the apples with both sugars, the zest, salt and cinnamon
3.)  Place them in a large dutch oven, cover and cook over medium heat--stirring often-- until they are tender but still hold their shape when pierced with a fork.  This took me between 10-15 minutes.
4.)  Dump them out onto a large baking sheet until they cool completely.
5.)  In the meantime prepare the custard by whisking together the flour and salt in one bowl
6.)  In a second medium bowl whisk together the egg, creme fraiche and vanilla extract until fully combined
7.)  Pour the dry ingredients (flour, salt mixture) into the wet and stir/whisk until fully combined
8.)  Once the apples are cooled, pour them, without the juices, into your pie dish (I arranged them individually to pack them in tightly and neatly because I was hoping it would slice well in cross-section for the contest judges.  I think it did...but your call) that already has your pie dough rolled into it.
9.)  Pour the custard over the apples
10.)  Place your top crust over the apples and trim and pinch and crimp or fork or whatever you want to do to make it look pretty
11.)  For the egg wash, whisk together the egg yolk and cream and with a pastry brush apply it to the pie crust.
12.)  Place pie in the fridge to chill while you preheat the oven to 425
13.)  Once preheated bake the pie for 25 minutes, then reduce the heat to 375, rotate the pie 180 and bake for another 25-30 minutes or until everything looks nice and done.
14.)  Remove the pie from the oven and let cool completely before slicing into.

Yes!


Wednesday, October 2, 2013

Chocolate Macarons


Macarons.  Yes.  There are like 5 ingredients that go into macarons and they take less than a half hour to make.  Yet they still manage to frustrate the hell out of me.


I've made them four times now.


The first was disastrous and they looked more like potato chips than any sort of cookie I know of.


The second time was in a pastry making class and of course, due to a group effort and guidance from our instructor, they came out splendidly.


So, naturally being fully educated on the secrets of macaron-making I headed home to give them another shot surely knowing all that there possibly is to know about making them.


And I rejoiced when they came out of the oven for the first minute.  They looked pretty--and actually tasted great but I decided to make giant mega macarons (like the mouth-watering ones I gobbled down at Thomas Keller's Bouchon Bakery this past summer) and didn't account for the extra baking time (I think this is what went wrong?) needed to bake them so they were more marshmallowy and had the thinnest shell imaginable.


But I did not stop there because I was fairly determined and irritated that I couldn't get a good macaron on my own.  So I went for a fourth try.  And these were definitely an improvement.  I did end up throwing out a batch but I ended up saving two--one being better than the other but both being better than the one I trashed.


I think the biggest problem I have with making macarons is getting the right consistency with the batter and not deflating the merignue.  I always read that it should be a "lava-like" flow...  Well, perhaps I need to start watching some Youtube videos of more lava flows because I'm having trouble with this.  Or maybe it just takes some more practice...  I'm going with I just need more practice--and I'm willing to accept that.  They are kinda fun to make and even more fun when they come out magnifque (that's French! like macarons!).  Plus, you can add just about any type of filling and flavor you can think of--buttercream, whipped cream, chocolate, ganache, fudge....  Get it?


My favorite is buttercream but I was actually making these for a friend who is anti-buttercream (he's cray cray) and pro-fudge (well, maybe not that cray cray) so I made a chocolate fudge filling.


Like I mentioned earlier--due to my lava-like batter troubles--these came out kind of flat which I think was a result of deflating the meringue.  I also had to adjust the baking times a tad between the batches because the first batch that I made and threw away had the same sort of marshmallowy under-baked texture that the mega macarons I tried to make had.  So I increased it ever so slightly by a couple of minutes.

Despite these ones being a vast improvement from my first batch (I dare call them a success), I actually can't wait to go another round at them.


This is the recipe from the Cook Au Vin pastry making class:

200g egg whites (our instructor believed chilled egg whites was best which I abided by but I've also read conflicting arguments for using room temperature ones)
200 g almond flour
350g powdered sugar
75g granulated sugar
1/2tsp cream of tartar
2tbsp unsweetened cocoa powder (I might add more or some food coloring if you want them darker or with more chocolate flavor)

Any filling of your choosing that amounts to about 2 cups

1.)  Combine almond flour and powdered sugar in a food processor and process until well combined (you can also just whisk the two together but I wanted a smooth shell and so I didn't want any big particles of almond flour so I tried to get the mixture as fine as possible.  However, I did read somewhere once that if you process the almond flour too much you could end up releasing some of the oils and apparently that spells trouble for the batter so I guess just beware...
2.)  Set aside flour/sugar mixture
3.)  Combine in a mixer the egg whites and the cream of tartar and whisk on high speed until foamy.
4.)  Add the granulated sugar and whisk on high until stiff peaks form
5.)  Add the flour/sugar mixture in three separate additions until just combined using the lowest setting on your mixer.  Do not over-mix or you will deflate the meringue.
6.)  Add the cocoa powder in and mix on the lowest setting for 15-20 seconds
7.)  Remove the bowl from the mixer and use a spatula to fold the rest of the cocoa in until it's evenly distributed and hopefully you will have a lava-flow like batter
8.)  Pour the batter into a piping bag and pipe out 1 1/2 inch circles onto prepped baking sheets (I prepared templates and put them under some parchment paper/slipmat to better help my piping endeavor)
9.)  Let the piped out macaron circles sit out at room temperature for 1 hour.  This dries them out and helps them form their shell.
10.)  About ten minutes before the hour is up, preheat the oven to 315 
11.)  Bake for 5 minutes at a time turning the baking sheets 180 degrees after the first 5 minutes and then leave them in for another 5 minutes (10 total).  As I mentioned previously I kept my last two batches in for an extra two minutes (12 total for me) which I think helped them form a sturdier shell/bake through.
12.)  After they are done baking remove from the oven and you have two options here--let them cool at room temperature or do what my instructor recommended and put them in the freezer directly and leave them there for a day before filling.  Apparently this helps maintain a moist interior for the macaron and a hard shell.  I did this and it worked just fine.  If you don't have time, just let them cool completely and fill when ready.

So the next day I made the fudge and filled them.  I keep them in an airtight container in the freezer.  I've read often that they taste better as time passes so if you don't have to eat them right away then this might be a great option. Bon Apéttit!


Tuesday, September 24, 2013

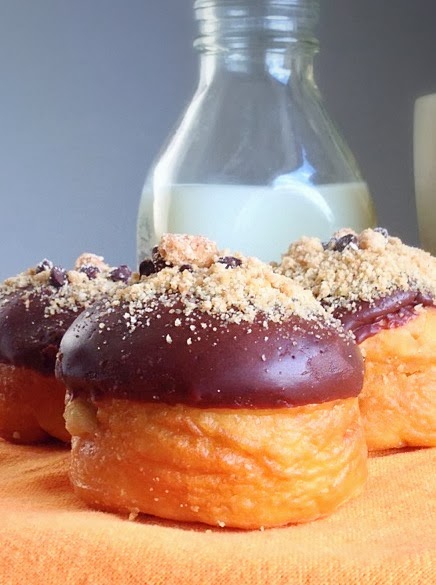
Chocolate Donuts Filled w/Bourbon Flavored Peanut Butter


This recipe has been in my queue for a while.  My queue is all of the recipes that I find online poring through other food blogs and e-mail them to myself.   They looked decadent and even over the top to me and sometimes when I see a recipe like this I hesitate to make it just because I think it might be too over the top.  But it was my turn to bring in breakfast at work so I felt that as long as I was distributing the over the topness then I could convince myself to finally make these.  And I actually didn't need too much convincing because I really like making donuts.  They're so fun.


You can make them in various shapes and sizes and fill them or not fill them and frost them or not frost them and roll them in cinnamon and sugar or just sugar or just cinnamon or not.  And you can make either cake donuts or yeasted ones--and what's more you can fry them or bake them!    See?  They're very versatile.


So this recipe is a yeasted filled donut that is fried in oil--which in my donut making experience I have found to be my favorite type to make. It requires some more work and time but in the end--if everything goes well you've got yourself a superb donut.


I inadvertently adapted the recipe from here.  Inadvertently because evidently I didn't read the ingredients as thoroughly as I should.  Needless to say that deep into my preparation I realized that amongst many things I didn't have any half and half and I was a teaspoon short on the yeast.  Alas, I made some compensations and adaptations and all was well.  For the most part.


Here is what I did instead:

I followed the streusal topping and the peanut butter pastry cream down to the letter.  Both turned out great except that the pastry cream was a bit "chunky" or curdled looking after I whisked in the peanut butter itself.  So I put it in my mixer with the whisk attachment and whisked the hell out of it until it came together--which it did just fine.  Also I probably put somewhere between 1/4 and 1/2 a cup of bourbon in the mixture.  I decided to do it 1 tablespoon at a time because in all honesty I 'm not a huge fan of boozy desserts.  I wanted to be able to just ever so slightly taste the bourbon.  But, I kept feeling as though I couldn't yet so I continued to add tablespoon after tablespoon and I lost track of how much I actually added (the fact that I was watching Seinfeld re-runs may have contributed to my distraction also...).  Nevertheless in the end I think it was too much.  After it settles in and marinades the pastry cream its presence becomes much stronger so next time I would either nix it as a whole or just add a couple tablespoons total.

For the donuts themselves I applied everything exactly as the original recipe aside from the following:

2 tbsp + 1 tsp of active dry yeast vs. 2 tbsp + 2 tsp
2 c of buttermilk vs. 2 c of half and half
4-5 c of all-purpose flour vs 4-5 c of bread flour  (also, it took me more like 6 c to get to the consistency described in the original recipe)
1/4 granulated sugar

Lastly, for the chocolate glaze I followed the instructions with the exception of:

1 tbsp of light corn syrup vs tbsp of dark corn syrup

All in all the donuts were great.  Generally it was received well with my co-workers.  At the same time the dough itself was a bit too dense--denser than my go-to yeasted donut recipe I have used.  But that may have been a result of some of my substitutions too.  Eh.


Wednesday, September 11, 2013

Financiers (Chocolate Almond Cakes)


I know.  They look like mini cupcakes.  And they are.  But they aren't.  It's confusing.


They are actually called "Financiers" and the big differences that set them apart from regular cupcakes is that for one thing they primarily use almond flour (and a little all-purpose) and egg whites.  Also, from what I understand, they have little mini loaf pans that you are supposed to use for the mold.


But if you don't have those then a mini cupcake pan is the next best option.  Thus, using that also makes them look more like cupcakes....and I frosted them with chocolate ganache which didn't distinguish them any further.


About that ganache.  You saw it up there.  That was the main impetus for making these--at least at this point.  I had been planning on making them ever since I borrowed and read and then copied several recipes from David Lebovitz's The Sweet Life in Paris.


But why I made them now is because I had a TON of leftover chocolate ganache that I used for some cookies I made the day before.  So I had to use it.  I couldn't just toss it.  That would have been outrageous.


I thought about sitting down at the table with a spoon and lapping it up.  But then I thought better.  That would have been dangerous and I may have been on a constant sugar high and probably wouldn't have felt so good afterwards.


I mean I love chocolate but even I have my limits.  It was a lot of ganache.


So these came little guys came to fruition.


And I got rid of that ganache.


Financiers (Chocolate Almond Cakes) - Adapted from The Sweet Life in Paris by David Lebovitz:

6 tbsp (90g) melted and cooled unsalted butter
1c (90g) sliced almonds or almond flour (I used almond flour)
3 tbsp (25g) unsweetened cocoa powder (he suggests using Valrhona and since I had some I did)
1 tbsp (10g) all-purpose flour
1/8 tsp salt
3/4c (90g) confectioners sugar
1/3c (about 2-3 egg whites from large eggs) at room temp.
1/4 tsp almond extract 

1.)  Grease a mini-muffin pan (or a mini loaf pan) and preheat the oven to 425
2.)  Melt the butter in the microwave or stovetop and set aside to cool at room temp.
3.)  Add the almond flour (or sliced almonds), cocoa, flour and salt to a food processor and process to combine (if using sliced almonds process until they are finely ground down to an almond flour size)
4.)  Transfer the dry mixture to a medium bowl and add the egg whites and almond extract and stir to combine
5.)  Gradually stir in the melted butter and stir until fully incorporated into the batter
6.)  Spoon the batter into the mini-muffin pan so each one is about 3/4 full
7.)  Bake for 10-15 minutes (mine took only about 10) until puffed up and springy and or a toothpick comes out clean
8.)  Remove from oven and cool completely before removing from pan

After they cooled, I filled a pastry bag with the leftover chocolate ganache and piped it on the financiers.  This is optional and is not included in the original recipe.  However, you can do it or use something similar but they are quite tasty on their own...


Wednesday, September 4, 2013

Triple Chocolate Cake


 This is what I want to call this cake:


C3


But I can't figure out how to type the superscript into the 'Blogger Post Title' without using HTML.  So I'll have to settle for Triple Chocolate Cake.

If I haven't mentioned it before I love chocolate more than any other food in the world.  I love all types of chocolate--dark, milk and white alike.


The big idea

A couple of years ago a good friend of mine gave me this book on cooking/baking ratios.  It's really cool actually and it allows you to experiment all by your lonesome and come up with your own recipes.  So this cake is my own creation.  I'm excited to share it.  I keep tweaking it here and there so it's not perfect but it's getting there.

I was excited to make this cake for several reasons:

1.)  I love making cakes
2.)  I love eating cakes
3.)  I love chocolate
4.)  I found a place that sells Valrhona cocoa powder (a couverture chocolate that is normally elusive to me) and immediately purchased a package
5.)  Then I found another place that sells Valrhona baking chocolate in bulk! (another sign obviously!)
6.)  I wanted to test my cake decorating skills with making buttercream roses and that ombre petal    technique that became so popular a while back.


 So I decided to make one that was 3 layers:  A white chocolate cake layer, milk chocolate layer and dark chocolate layer.  In between the cake layers would be a whipped white chocolate ganache, then a whipped milk chocolate ganache followed by a dark chocolate ganache.  And finally to envelop the cake, and to achieve my ombre effect, I frosted it with white, milk and dark chocolate swiss meringue buttercreams respectively.  It was a triple chocolate cake of the most extreme extents that I could imagine.


The dark chocolate layer is the cake recipe that I've worked on the most but this time I used the Valrhona cocoa powder I found.  It was so dark and beautifully chocolatey.  Personally I think it was the best layer.  On the other hand, for the milk and white chocolate layers I didn't have any cocoa powder so I used my same recipe but I used the melted milk and white Valrhona baking chocolates.  These layers were slightly denser.  I think that's probably because I used some extra liquid in my dark chocolate layer to melt the cocoa powder in and nixed this extra liquid from the milk and white layers.  Also, using melted chocolate in a recipe versus cocoa powder just seems to lend to a different textured cake no matter what.  And I do prefer using cocoa powder--I think it reigns supreme for cake.  Nevertheless, I think I'll either add the extra liquid to these layers next time or--if it exists and I can find it--use milk and white chocolate cocoa powders.

As far as my decorating skills go....I think they are improving.  I've tried the ombre petal technique before--about a year ago with a 4th of July cake I made.  When I made that I was up until midnight working on it (on a school night no less).  It was one of those hot humid nights so I was sweating mega-style and I was exhausted so it turned out sorta ok.

My 4th of July cake. I guarded it with my life.

But this time I planned ahead and it turned out much better.  I think it has to do with using swiss meringue buttercream too.  This buttercream is so creamy and smooth and easy to work with.  And not that it's a bonus for me because I have a mammoth sweet tooth as is but it is less sweet than those quick buttercreams that use a pound of powdered sugar.  It's a bit more work to make but I think it's definitely worth it.


 Anyway, I think my little cake is pretty dope. So, yeah.  I like cake.


For the cakes:

Dark Chocolate layer

75g cake flour sifted
22g Valrhona cocoa powder (or any brand of unsweetened cocoa powder that you have)
100g granulated sugar
44g melted unsalted butter cooled
18g oil
1 large egg at room temperature
1/4c buttermilk at room temperature
1/4c boiling water
1 tsp potato starch
1/4 tsp baking powder
1/4 tsp baking soda
1/8 tsp salt

Preheat the oven to 350
Grease a 6" cake pan and insert a circle of parchment paper on the bottom of the pan
Whisk all dry ingredients together except for the cocoa powder
Sprinkle cocoa powder over 1/4c of the boiling water and stir in a bit
Whisk the butter, oil, egg and buttermilk together
Pour the wet ingredients into the dry ingredients and stir/fold just until combined
Pour the cocoa powder/boiling water mixture in the batter and lightly stir/fold in
Pour full batter into greased 6" cake pan and spread evenly
Bake at 350 for 27-28 minutes or until an inserted toothpick comes out cleanly
Remove from oven and cool completely before removing cake from pan


Milk Chocolate layer

97g cake flour sifted

100g granulated sugar
44g melted unsalted butter cooled
18g oil
1 large egg at room temperature
1/3c buttermilk
1 tsp potato starch
1/4 tsp baking powder
1/4 tsp baking soda
1/8 tsp salt
2 1/2 oz melted Valrhona milk chocolate


Preheat oven to 350
Grease a 6" cake pan and insert a circle of parchment paper on the bottom of the pan
Melt chocolate using either a double boiler or in the microwave.  Set aside to cool 
Whisk all dry ingredients together
Whisk the butter, oil, egg and buttermilk together
Pour the wet ingredients into the dry ingredients and stir/fold just until combined
Pour the melted chocolate into the batter and fold/stir in until combined evenly throughout batter
Pour full batter into greased 6" cake pan and spread evenly
Bake at 350 for 30-35 (it was closer to 35 for me) minutes or until an inserted toothpick comes out cleanly
Remove from oven and cool completely before removing cake from pan


White Chocolate layer

97g cake flour sifted
100g granulated sugar
44g melted unsalted butter cooled
18g oil
1 large egg at room temperature
1/3c buttermilk
1 tsp potato starch
1/4 tsp baking powder
1/4 tsp baking soda
1/8 tsp salt
2 1/2 oz melted Valrhona white chocolate


Preheat oven to 350
Grease a 6" cake pan and insert a circle of parchment paper on the bottom of the pan
Melt chocolate using either a double boiler or in the microwave.  Set aside to cool 
Whisk all dry ingredients together
Whisk the butter, oil, egg and buttermilk together
Pour the wet ingredients into the dry ingredients and stir/fold just until combined
Pour the melted chocolate into the batter and fold/stir in until combined evenly throughout batter
Pour full batter into a greased 6" cake pan and spread evenly
Bake at 350 for 30-35 (it was closer to 35 for me) minutes or until an inserted toothpick comes out cleanly
Remove from oven and cool completely before removing cake from pan

Note:  I baked all 3 cakes at the same time which may have contributed to some of the longer baking times for a 6" cake?  Or maybe it was just the batter...

For the whipped chocolate ganaches I used these instructions found here.  It's a 50/50 combination of chocolate and cream so I used 2 oz of chocolate and 2 oz of heavy cream for each type of chocolate.

For the Swiss Meringue Buttercream:

297g of granulated sugar
198g of egg whites (6-7 eggs)
pinch of salt
3-4 sticks of butter 
2 oz of melted and cooled dark, milk and white chocolate respetively

I always use these instructions for reference.  

Note:  The amount of butter you use varies--it just depends on when the buttercream starts coming together so you just keep adding the butter little by little until you see it forming a heavier whipped texture.  I actually ran out of butter (I had less than 4 sticks) and ended up using vegetable shortening for the last leg until it started coming together and it worked just fine.

After I made the buttercream I divided it up into thirds and poured in each of the cooled melted chocolates respectively and whipped each until fully combined.

To assemble the cake, I put the white chocolate layer on the bottom, spread the whipped white chocolate ganache over it.  Then came the milk chocolate layer and atop that the whipped milk chocolate ganache.  Lastly the dark chocolate layer and spread over that was the whipped dark chocolate ganache.  After that I covered the cake in a crumb coating of buttercream and after it set in sitting in the fridge for about a half hour I began to frost the rest of the cake.

For the petal decorating technique I used this excellent tutorial I came across a while back.  It's very helpful.