Showing posts with label Cookies. Show all posts

Thursday, April 28, 2016

Banana Nilla Cookies


I've made cookies from at least two James Beard Foundation award winners.  Both recipes were amazing.  At the same time, both recipes were rather involved--or at least included some extra steps. And, I don't mean that to act as a deterrent to anyone thinking about making something from a JBF award winner.  I mean, there is a good reason why they've won the award.  These cookies from Mindy Segal's Cookie Love were spectacular.  There were a lot of steps involved in the making of these cookies but they weren't difficult steps.  And if you have everything ready and able--or store bought--then it probably won't take you nearly as long.  I didn't, which is probably the main reason I'm bringing this up.  So, don't be like me--be more prepared.  Now let's discuss the actual cookies.


What Mindy Segal has done is created a homemade recipe for Nilla Wafers.  She then used them to sandwich a banana caramel buttercream filling and topped them off with two types of chocolate--a bittersweet and a caramelized white chocolate.  The result is a decadent sandwich cookie that to me--due to the bananas--has a fairly accented fruity flavor--which is a good thing.  The cookies are softer and more pillowy than actual Nilla Wafers and pack a good vanilla flavored punch.  The bittersweet chocolate comes through nicely but I personally didn't think the caramelized white chocolate one did as much.  In truth, I think it's more decorative than anything.  But at the same time, I've been wanting to caramelize white chocolate for a while now and this project gave me a good reason to do so.  And by the by, even though I don't necessarily think it came through with these cookies, caramelized white chocolate is pretty damn tasty on its own--well worth the effort of caramelization.


What I really like about these cookies is the pure fact that they are sandwich cookies.  Basically my philosophy over sandwich cookies is the more the merrier.  Barring the fact--but probably because of this very fact--that sandwich cookies are double the cookie--which means they are double the fat, sugar, refined flour, blah blah blah--they are my favorite type of cookie.  I'll always take an oatmeal cream pie over a regular oatmeal cookie or an Oreo (preferably double-stuffed) over a simple chocolate wafer.  And now I can state, with a clear conscience that I would definitely take a Mindy Segal Banana Nilla cookie over a simple Nilla Wafer.  Yes, they're more decadent and more calories but they're a little more complex and a lot more fun to eat.


Recipe via the kitchn for Mindy Segal's Banana Nilla Cookies (makes about 30 sandwich cookies)

Cookies

1/3c unsalted butter at room temp.
1/3c vegetable shortening
1c powdered sugar
2/3c granulated sugar
2 extra-large eggs at room temp.
1 tsp vanilla extract
1 1/2 T water
3c cake flour
1 T baking powder
1/2 tsp kosher salt
1/2 tsp sea salt flakes (I used Maldon)

Using a large bowl, whisk together the flour, baking powder and salts and then set it aside.  Then in a small bowl crack in the eggs and add the vanilla and water and set that aside.  Next in the bowl of a stand mixer, combine the butter and shortening using the paddle attachment.  Mix that until they are combined on medium speed.  Add the sugars to the mixer bowl and cream the mixture on medium-high speed for about 5 minutes.  Then add each egg into the fat/sugar mixture one at a time--mixing just until it looks like cottage cheese.  Stop the mixer, scrape down the sides and bottom of the bowl and run the mixer for a minute more just make sure all that side and bottom stuff has been re-introduced into the mixture.  Now add the flour mixture all at once and mix on low speed just until combined.  Next, place a large sheet of plastic wrap flat on your work surface.  Scrape the batter onto the plastic wrap and pat it into a rectangle.  Wrap the batter up tightly and refrigerate it overnight.

The next day when you are ready to cut out the cookies and bake them, get out two baking sheets and cut out pieces of parchment paper to fit them.  Then lay each sheet of parchment paper on your work surface--you're going to roll out your dough directly on each parchment sheet.  Now, remove the dough from the fridge, unwrap it and cut it in half.  Place one half back in the fridge and leave the other one out.  Lightly dust one sheet of parchment paper with flour and place the one half of dough on top of it.  Roll out the dough to 1/4 inch thickness (you can either place an additional sheet of parchment paper on top of the dough and roll or lightly flour the surface of the dough while rolling). Once you've got the dough rolled out to 1/4 inch thickness, place a sheet of parchment paper on top of the dough, ease the sheet of dough onto a baking sheet and refrigerate it for one hour.  Do the same thing for the other half of dough.  Once the hour is up, preheat your oven to 325 F.  Remove one sheet of dough at a time from the fridge and ease the sheet onto a work surface.  Place a silicone baking mat or another sheet of parchment paper onto the baking sheet.  Then with the dough, remove the top sheet of parchment paper and cut out 2 inch circles of dough--re-rolling the dough with the trimmings and cutting once again as needed.  Place your cookie circles on the prepared baking sheet, lower the oven temperature to 300 F and bake for 7-10 minutes or until the cookies feel firm.  Remove the cookies from the oven and let them cool completely before sandwiching.  Repeat with the remaining half of dough.

Banana Puree

2 medium overripe bananas
2 T granulated sugar
1/4c water
1 T freshly squeezed lemon juice

Break the bananas up with your hands into chunks.  Place them--along with the rest of the ingredients in a small saucepan over medium heat.  Cook them for about 5-7 minutes or until the bananas are soft and easily break apart when nudged with a spoon.  Once that is done, place the mixture in the bowl of a food processor and process until smooth.  Pour the puree into a small bowl, place a sheet of plastic wrap directly over the puree and let it cool completely.

Frosting

1c unsalted butter at room temp.
1c powdered sugar
Seeds from half of a vanilla bean
1 T vanilla extract
1/2 tsp kosher salt
1/2 tsp sea salt flakes
All of the banana puree you just made at room temp.
1/2c homemade or store-bought caramel sauce at room temp.

In the bowl of a stand mixer with the paddle attachment, beat the butter on medium-high until smooth.  Add the sugar and beat on medium-high for about 5 minutes.  Stop the mixer and scrape down the bottom and sides of the bowl.  Add in the vanilla bean seeds, extract and salts and mix until fully incorporated and evenly distributed.  Then add in the banana puree and mix in until fully incorporated.  Finally, add the caramel sauce and mix until that is fully incorporated.

Assembly

All of your cookies
Frosting
8oz bittersweet chocolate melted and cooled
2oz caramelized white chocolate melted and cooled (here is a good link to how to go about caramelizing white chocolate)

On your work surface, pair up the cookies with a suitable partner.  Fill a pastry bag with the frosting and pipe a tablespoon or two of the frosting on the bottoms of half of the cookies.  Sandwich each cookie with its unfrosted partner.  Dip each sandwich cookie into the bittersweet chocolate and set aside to set for a minute. Finally, using a fork or spoon drizzle the caramelized white chocolate over each sandwich cookie. Let the chocolates set and then enjoy at your leisure.


Tuesday, February 16, 2016

Buckwheat Linzer Cookies


Doughs made with buckwheat don't look all that appetizing.  They're the color gray.  Incidentally, I dare someone to name one gray food that looks inviting.  I for one can't think of any.


Luckily when you bake with buckwheat, it browns a bit so the appearance warms up.  But before that--yuck.  For this recipe I had to create this log of gray buckwheat cookie dough to chill so I could slice it up into cookie circles later and bake. As you can guess, the log of gray dough looked less than tempting--like some sort of generic sustenance that would be served to the masses in a post-apocalyptic earth science fiction movie.  It was sticky, wet and of course...gray.  The upside is that the old adage, don't judge a book by its cover, applies here.  The resulting cookies were delicious.


This recipe is another one from Alice Medrich's Flavor Flours.  I've been baking from this recipe book a lot lately--partly because I'm intrigued to see how some of Alice Medrich's gluten free creations turn out.  Also because I've bought just about every flour specified in the book and I'm afraid it's going to go rancid if I don't start using them up faster.  Nevertheless, its been fun.  And the buckwheat linzer cookies--despite their pre-baked appearance--were delectable. They were buttery, sweet and soft.  Aside from the color, the buckwheat adds a bit of a grainy texture to the cookie--which I didn't look at that as a negative attribute.  A little texture is nice sometimes.


But at the same time I feel as though I need to have a traditional linzer cookie at my side in order to properly perceive the differences between the two types of flours.  Plus, in addition to buckwheat flour this recipe calls for oat flour and white rice flour.  Technically, the buckwheat flour is the predominant flour in the blend but I can't help but feel that with the added butter and sugar plus the other flours it might be hard to pick out the flavor of the buckwheat.  Or...maybe my taste buds just aren't that sophisticated.


If anyone has any trepidation about baking with buckwheat, let me be the one to allay those concerns. It may look kinda gross before it's baked but it doesn't taste gross--unless you make it taste gross of course.  I'm assuming, from my recent experience that you could use it to make any number of good baked goods--this recipe being proof of that in fact.  It's different yes.  But certainly not in a bad way--in a good way, a real good way.


Recipe

55g (1/4c + 2 T) white rice flour
70g (1/2c + 2 T) buckwheat flour
65g (2/3c) oat flour
1/4 tsp kosher salt
1/8 tsp baking soda
100g (1/2c) granulated sugar
60g (1/4c) cream cheese cut into chunks
170g (12 T) unsalted butter at room temp. and cut into chunks
1 T water

1/2c of preserves--I used blackberry

Using the bowl of a food processor, combine all of the dry ingredients and process for about 30 seconds.  Then add everything else and process until a smooth ball forms.  Scrape the dough out of the food processor and divide it in half.  With each half of dough, form it into a log that is about 1 1/2 inches in diameter.  Wrap each log tightly in plastic wrap and refrigerate overnight.  The next day when you are ready to get baking, place oven racks in the upper and lower thirds of the oven and then preheat it to 325 F.  Line two baking sheets with either silicone baking mats or parchment paper and set them aside.  Next, take one chilled log of dough from the refrigerator and slice it into just a little less than 1/4 inch slices and place each slice on baking sheets at least 2 inches apart.  Make sure you have equal slices on each sheet--it will make the next step a little easier.  Do the same thing with the other log of dough.  Bake two baking sheets at a time for 12 minutes.  Remove the baking sheet from the upper rack.  Place the one on the lower rack into the upper position and rotate it 180 degrees. With the baking sheet that was removed from the oven, use a 1/2 inch cookie cutter to cut circles in the middles of each cookie--the centers may or may not pop out--it doesn't matter whether or not they do.  Place the baking sheet in the lower rack and bake both sheets for another 10-15 minutes or just until the edges start to brown a bit.  Once done, remove each baking sheet from the oven and let the cookies cool completely on each sheet.

Once the cookies are cooled, match all of them up and spoon about 1/2 teaspoon of preserves on the bottom of each one.  Sandwich it with the cut-out top and enjoy.


Tuesday, January 12, 2016

Black and White Cookies


I've been feeling fairly unmotivated lately with respect to baking.  Nothing seems to really capture my attention.  I think part of it comes from the fact that I did a lot of it over the holidays and I feel a bit burnt out.  I scoured all of my cookbooks and then through my list of saved recipes and baking to-do's and still, nothing really stood out.  It was sad.


I want to bake but maybe it's just too soon... Or so I thought.  Last night I had a budding inclination to make something.  I still felt just so so about the idea but I mustered through my lackadaisical countenance and found at least one thing that gave me some inkling of motivation allowing me to break out my mixer's paddle attachment.  And for whatever reason that inkling of motivation manifested itself in the form of black and white cookies.  I mean the idea of making them just popped into my head without any discernable suggestion.  But I went with it.


Admittedly, I see black and white cookies around quite a bit but never pick one up. Although, they always appeal to me. They have the best of both worlds--both white and chocolate icing.  At the same time they remind me of those yellow smiley-faced cookies they sell at gas stations and convenience stores.  And those I'm not into so much.


Actually, those are appealing too--mostly because of all of that icing they have slathered over them--but they're also fairly disappointing to me. The cookie is usually too hard and the icing tastes like nothing.  So I just assume that the black and white cookie will be that way too.  Yet, what I began to understand from some of the recipes and background information on the black and white cookie is that it's actually supposed to be more of a cakey cookie. Obviously this threw my mind through a whirlwind.  I was confused.  Distraught.  Everything I had assumed about these cookies was suddenly askew.  Luckily I rebounded quickly and just made the damn cookies.


As promised they were cakey and soft--not necessarily as I expected them to be--which was good. The icing on the other hand wasn't much to write home about--it's sugary sweet and good of course but it's not like it's the most amazing icing you'll ever taste.  There weren't any added flavorings added to the white icing side and the chocolate just tasted liked chocolate icing--good but well...sugary.  In the end, the thing I took away most from the black and white cookie is that it's a simple cookie.  It's a good simple cake-like cookie.  There's not much flair to it.  It's iconic.  And it's black and white on top.


Recipe slightly adapted from: http://cooking.nytimes.com/recipes/9434-black-and-white-cookies 

I halved the recipe which made about a dozen 3 inch cookies.

What you need for the cookies:

175g granulated sugar
113g unsalted butter softened
2 large eggs at room temp.
3/4c whole milk at room temp.
1/4 tsp vanilla extract
1/4 tsp lemon extract
140g cake flour
177g all-purpose flour
1/4 tsp baking soda
1/4 tsp kosher salt

To make the cookies, first preheat the oven to 375 F.  Then, line two baking sheets with parchment paper or silicone baking mats.  Using a medium bowl, whisk the flours, baking soda and salt together and set that mixture aside.  Next, in a large bowl of a stand mixer cream the butter and sugar together on medium-high speed until light and fluffy--about 5 minutes.  Then add in the eggs, milk and both extracts to the creamed mixture and mix until fully combined.  Then in a few batches, add the flour mixture--mixing on low speed just until it is incorporated.  Once all of the flour has been added, remove the bowl from the mixer and begin scooping the spoonfuls of batter onto the baking sheets. You'll want to scoop about 2 tablespoons of batter for each cookie and place them at about 2 inches apart from each other.  Finally, bake the cookies for about 17-20 minutes or until the edges are slightly browned.  After they are done, remove them from the oven and let them cool completely before icing them.

For assembly....

Make the white icing first using:

113g confections sugar
1/8c boiling water

In a small bowl, mix the boiling water and confectioners sugar until completely smooth.  Then spread some of the white icing over half of each cookie.  The quicker you work the better because the icing will start to harden as time passes--which will make it impossible to spread.

Then make the black/chocolate icing using:

113g confectioners sugar
1/2 oz bittersweet chocolate
1/8c boiling water
1/2 tsp light corn syrup

Place all of the ingredients in a small bowl set over a pot of simmering water and stir until smooth and fully combined.  Working quickly--because the same will happen to this icing as well if you let too much time to go by--spread the black icing over the other half of each cookie.  Let the icing set and then enjoy the cookies!


Friday, September 25, 2015

Chocolate Chip Oatmeal Cookies


If I had to choose one savory food to live with for the rest of my life it would probably be pizza. And it could be any type of pizza--I mean I do have my favorites but I wouldn't necessarily pass up a slice of thin, pan or deep dish either.  If I could accompany that pizza with a dessert, then I'd likely choose chocolate chip cookies.  


Similar to pizza, I love all types of chocolate chip cookies.  I like them big, small, crunchy, chewy, gooey or some variation/combination of any of those.  So when I see a new recipe claiming to be "the best chocolate chip cookie recipe," I'm sold.  Regardless if it is actually the best, it's a pretty sure bet that I'm gonna like it.  However, this particular cookie recipe wasn't claiming to be the best chocolate chip cookie recipe.  But, it was voted the King Arthur's 2015 best recipe of the year.  You read that, right???  The recipe of the year.  


That means--as far as I can tell--that out of ALL of the recipes King Arthur came up with, a chocolate chip cookie recipe seized the day and came out as number one.  Naturally, I decided to give the recipe a try.  And I'm glad I did. Not only did the recipe make like 20 giant-sized cookies, they were all titillating to my taste buds.


As the title indicates they weren't just chocolate chip cookies, they were chocolate chip oatmeal cookies. But they weren't oatmeal chocolate chip cookies.  By that I mean that they were chocolate chip cookies with some oatmeal in them.  They weren't oatmeal cookies with some chocolate chips in them.  See the distinction?  Good.


Now, these were the crispy on the edges and chewy in the middle type of cookie.  They also had a ton of chocolate in them.  The original recipe called for chocolate chips but I had these chocolate discs on hand--which I purchased in bulk from our local chocolate factory--so I used them--which I must confess was a superb choice because it created giant pools of chocolate instead of dispersed puddles throughout the cookie.


Another thing about these cookies that I really feel contributed to their unique character was the vanilla.  The recipe called for a full tablespoon of vanilla extract.  That's kind of a lot compared to most tried and true chocolate chip cookie recipes--they usually have a teaspoon at most.  And that teaspoon provides a hint of vanilla. This tablespoon made the vanilla loud and proud.  Well not loud. But it was definitely present and I liked that.


Although it did make me wonder if the vanilla was what made the cookie so great.  Like if I added a tablespoon of vanilla extract to any chocolate chip cookie recipe, would it stand out?  Then I thought about it some more and decided that no, that wouldn't necessarily happen.  And the vanilla certainly contributed to the greatness of these cookies but there were definitely other factors at play. I think that the amount of chocolate in them didn't hurt and the oatmeal gave it a bit more texture and crunch--which was a big plus.


I will concede that my opinion may not be so unbiased since I did readily admit that I've never met a chocolate chip cookie I didn't like.  But....nevertheless all in all, a well developed recipe worthy of its title.

Recipe via King Arthur found here

227g unsalted butter at room temp.
213g light brown sugar
99g granulated sugar
1 large egg at room temp.
1 large egg yolk at room temp.
1 T vanilla extract
241g all-purpose flour
99g old fashioned oats
1 tsp baking powder
1 tsp baking soda
1 tsp kosher salt
510g chocolate chips, discs or chunks

First, line two baking sheets with parchment paper or silicone baking mats and set them aside.  Then preheat the oven to 325 F.  Next, combine the flour, oats, baking powder, soda and salt in a medium bowl and set aside.  After that, using the bowl of a stand mixer with the paddle attachment cream the butter and sugars together until smooth--I did it for about 3 minutes on medium-high speed.  Then, stop the mixer, scrape down the bottom and sides of the bowl and add the eggs one at a time--mixing well between each addition.  Then add the vanilla and mix just until combined.  Now add the dry ingredients all at once and mix on low speed just until the they've been fully incorporated.  Finally throw in the chocolate and mix on low speed just until it has been dispersed as evenly as you wish throughout the cookie batter.  And now measure out about 1/4 cup full of batter and drop them onto the baking sheets leaving at least two inches around each lump of batter.  Bake the cookies for about 15-16 minutes.  Once they're done, remove them from oven and let them cool for about 8-10 minutes on the pan before removing them.  Eat. Love. Pray. Gay.

Tuesday, December 23, 2014

Gingerbread Farnsworth House


One of the things I loved most about architecture school was making scale models.  And I felt that building my own gingerbread house would be a way to revive my model-making skills and get into the spirit of the gay ole holiday.  I had a whole tackle box full of scale model-making tools that were yearning for use again.  I used my X-acto knife for the first time since architecture school making this gingerbread house--paring knives just weren't cutting it.  It was fun.  


For those of you who don't know, the Farnsworth house is a residence--former residence turned architecture tourist attraction--in Plano, Illinois.  It was designed by Mies van der Roe some time during the 1940's-50's.  And I like it.  But that actually wasn't the reason I chose to re-create it using gingerbread cookie.  I thought it would be easy and also I have the Lego Architecture series Farnsworth house already built at home so it was easy to use it as a model for my model.  I basically made it 1 1/2x the size of the Lego house.  


And about that thought I had that there would be some ease to making it... I was semi-wrong.  I mean, if you look at the house it's just a glass box--simple enough?  Well yes and no.  That glass was what gave me some trouble.  I read that you can make sugar glass by the same manner you use to make caramel--you just have to cook it slowly and take it off the heat before it begins to turn that caramel color.  I practiced doing that several times and it worked but then the sugar would re-crystallize on the surface of the sugar glass and it would look like frosted glass.  I wanted clear glass.  But after several attempts, I gave up and just let the frost win.  I figured it would just make it look like the glass had frosted over in the winter climate.  Whatever.  

But that was actually the most difficult part about it.  I thought I was going to have some issue with propping the house up with the gingerbread columns but that royal icing works wonders and is seriously an excellent adhesive.  

Aside from that, I just decorated the rest of it as I pleased using m&m's, jelly beans, gummy bears, sno-caps and some other random candies--that part is completely up to you.


Recipe for gingerbread cookie dough from the Joy of Cooking:

1c butter
1c granulated sugar
1c unsulphured molasses
5c all-purpose flour DIVIDED
1 tsp baking soda
1 tsp salt
1T ground ginger
1 tsp ground cinnamon
1 tsp ground nutmeg

In a small saucepan, melt the butter over low heat.  Once it's melted, add the sugar and molasses and stir constantly over low-medium heat until all of the sugar has dissolved.  Dip your finger in the saucepan (make sure you don't burn yourself) to make sure it no longer feels gritty.  Once the sugar is dissolved, remove the saucepan from the heat and set aside to cool to a lukewarm temperature.  In the bowl of a stand mixer, whisk 4 1/2c of flour and the rest of the dry ingredients.  Pour in the lukewarm butter/molasses/sugar mixture and mix on low speed until fully combined.  Remove the bowl from the mixer and using a wooden spoon or a big silicone spatula, fold in the remaining 1/2c of flour. Wrap the dough in plastic wrap and refrigerate until cool-cold.  When you are ready to bake the dough, line a baking sheet with parchment paper or a silicone baking mat.  Preheat the oven to 350 F. Roll out the dough and cut the patterns or shapes of the parts of the house you need and bake them for 12-15 minutes.  Let cool completely before use.

For the sugar glass, I went to Martha:

1 1/2c sugar
3/4c water

In a medium saucepan over medium-high heat, stir together the sugar and water until all of the sugar has dissolved and the mixture comes to a boil.  Stop stirring and turn down the heat to medium-low. Continue to cook until the mixture reaches 290 F or just before it starts to turn that caramel color. Immediately pour the mixture into a mold that you are using for whatever shape you want--let me know if you want to know precisely what I did.  I'm happy to share.  Let the sugar glass harden and cool completely before picking it up and using it.

Royal icing

1 large egg white
1c confectioners sugar DIVIDED

In a small microwave safe bowl, stir the egg white and 2/3c of the sugar together until fully combined. Place the bowl in the microwave and microwave it on high in 10 second increments until the temperature reaches 160 F.  Remove the bowl from the microwave and pour the mixture into the bowl of a stand mixer.  Pour the remaining sugar in the bowl.  Using the whisk attachment, beat the mixture until stiff peaks form and the icing has cooled completely.  Use immediately or store in a covered container in the fridge for a few days.  Just make sure you place some plastic wrap directly atop the icing so it doesn't harden before you use it.


Wednesday, November 12, 2014

Bourbon Oatmeal Brown Butter Cream Pies


I've had my eye on these cookies for a while now.  I tend to forget about how much I like other cookies.  You see, I--like most people in the world--gravitate towards chocolate chip cookies.  What's not to like?  They have a sweet buttery dough with chocolate morsels dispersed throughout and every time you bite into one of those morsels it's quite pleasant.  Quite pleasant indeed.  So every time I want a cookie I always just default to the chocolate chip cookie.  But every once in a while I'll take a bite from a peanut butter or oatmeal raisin cookie and I'm like, oh this is also a fucking amazing cookie!  So one day I saw these oatmeal cream pies and I felt drawn to them, to both make them and shove several of them in my mouth in a glutinous, greedy fashion.


A few weeks ago I made an attempt to make them but I was thwarted by lack of butter.  This recipe calls for five sticks of butter.  I only had four.  So I put the kibosh on that endeavor and decided to put them on the back burner when I had a sufficient supply of butter.  And a couple of days ago I had such a supply and moved forward with the cream pies.  There are a lot of things that appeal to me about these cream pies.  As if two cookies sandwiching buttercream isn't enough, they also called for bourbon in the cookie batter and browned butter for the cream filling.  It seemed so warm and cozy and boozy and perfect for the crap cold Fall weather that just engulfed our city.  And they were. These cream pies were damn good, amazing.  I loved them.  But I felt there were a couple of things that could be improved.


When I was reading through the recipe I saw that, for the cookies, it included mostly brown sugar plus some molasses which made me think these were going to be very soft and chewy.  And they were--so much so that they immediately reminded me of those Little Debbie oatmeal cream pies--which for some reason I had completely forgotten about.  But these weren't as wholesome as the Little Debbie ones because--and since I'm not a parent I suppose I couldn't vouch for this--I don't think a parent would send their kids to school with something that had bourbon in it.  However, since these only had a tablespoon they actually weren't so boozy.  Maybe it's because I used Makers Mark instead of actual bourbon?  I doubt that actually.  I think they could use more than a tablespoon perhaps to taste the liquor.  But that wasn't the only thing that I felt could be improved with the cookie portion of the cream pies.


Overall they were good but they were also a little bland. They either needed more salt to bring out some of the flavor or some other spice like cinnamon or nutmeg or allspice or some shit like that.  I think I would try maybe some more salt and some cinnamon.  As for the cream filling, I wouldn't really change a thing (except I added a bit more salt because I'm really into salting buttercreams lately).  Browned butter is good in itself --as an addition to most things.  But browned butter buttercream is so fucking good. And as the thing that ties these two seemingly blander cookies together, it's truly the shining star of the overall cream pie.  And maybe it's supposed to be that way and that's why the cookie portions are a little just so..  But, I personally would like to try to add a little zing to the cookies too.  Nevertheless, this is a fantastic recipe and it reminded me that I should be more open-minded with my cookie making and consuming (I still love chocolate chips more than anything) because there are a ton of good ass cookies out there.


Original recipe just oh so slightly adapted from Food52

*Bring everything to room temperature--specifically the stuff you normally keep cold (butter, eggs)

-Preheat the oven to 350 F.  Line 2 large baking sheets with parchment paper or silicone mats and set aside

Ingredients for the oatmeal cookies:

2c all-purpose flour sifted
1tsp baking soda
1/2tsp salt (next time, I might use 3/4tsp)
1c/2 sticks unsalted butter at room temp.
1c light brown sugar
1/2c granulated sugar
2T unsulphured molasses
2 large eggs at room temp.
1T whiskey (original recipe called for bourbon)
1 1/2tsp vanilla paste or extract
2 1/2c rolled oats

-In a medium bowl, sift and whisk together the flour, baking soda and salt.  Set aside.
-In the bowl of a stand mixer using the paddle attachment, cream together the sugars and butter for about 5 minutes or until the mixture is light and fluffy.
-Add the molasses and beat to combine.
-Add both of the eggs and beat until well combined
-Add the whiskey and vanilla and beat until well combined
-Add the flour mixture all at once and using the lowest setting of your stand mixer, mix until just fully incorporated
-Add the oats and still using the lowest setting mix until just incorporated.  Or, cease using the mixer at this point and using a rubber spatula, fold the oats into the batter.
-For each cookie, place a heaping tablespoon on the baking sheets.  I fit 12 on each sheet and spaced them apart about 2 inches on all sides.
-Bake for 8-12 minutes (took me 10) or until golden brown.
-Remove from oven and cool completely on some cooling racks or something like that.

Ingredients for the cream:

1 1/2c/3 sticks of butter at room temp., divided
2T heavy cream
2tsp vanilla paste or extract
3/4tsp kosher salt
3c confectioners sugar

-First, brown 1c/2 sticks of the butter (here is a great tutorial on browning butter if you have never done it--it's very easy).  Once browned, remove from the heat and place it in a freezer proof bowl. Let it cool for about ten minutes and then place it in the freezer for about 25-30 minutes until it solidifies but isn't frozen.
-Once all of that is done, in the bowl of a stand mixer using a paddle attachment, cream both the browned butter and the third stick of unbrowned butter together until well combined and light and fluffy.
-Add the heavy cream and vanilla and mix until well combined.
-Add the confectioners sugar, 1 cup at a time, until fully combined.
-Beat until fluffy and light--another minute or two.

To assemble:

-Place a giant spoonful of cream onto the bottom of one, completely cooled, oatmeal cookie.
-Top that with another cookie and press them together very lightly to make sure they stick together.
-Eat and enjoy them in a major fucking way--with a glass of milk.


Wednesday, August 27, 2014

Corn Cookies


Yes....corn cookies.  They sound a little different, right?  Well they are a little different but in a good way--like a really good way.  They are sweet and salty and most definitely have a corn flavor to them. And for someone like myself who isn't in love with corn--whether it be corn on the cob or creamed corn--I thought that these were some dope ass cookies.  My partner, who on the other hand is a giant corn lover (something that always perplexes me), was entranced by these cookies.  He loves corn and sweets so this was the perfect dessert for him.  They hail from Christina Tosi's Momofuku Milk Bar cookbook which is essentially a product of the Milk Bar bakeries in NYC.  I've been to one of them and sampled some of their pies which were pretty amazing too.  One of the ones that I tried was their "crack pie" which is also a salty sweet corn flavored pie. In fact, that was the first thing I made from the cookbook.  In my opinion, these cookies are really the crack pie in a cookie form.  I'd give Christina Tosi an A++ on this gem of a cookie.

However, on a different note, I do have one qualm to pick with Christina Tosi.  I mean, there's no doubt that she is an amazing baker and I am greatly excited to bake just about everything in the Momofuku Milk Bar book--they are all drool worthy.  Yet, somewhere in the beginning of her book she states how she wanted to create recipes using traditional ingredients.  Well, now that I've whipped up just two of her recipes--and perused many more--I've discovered that her ingredients aren't so traditional.  The corn flavor in both the crack pie and corn cookies come a la freeze dried corn that's crushed into a powder.  I had never bought freeze dried anything so it took me a bit to find out where I could get some.  Eventually I found this brand at Whole Foods and another local grocery chain. And then there are ingredients she lists out for other recipes like milk powder and citric acid--not necessarily every day baking items.  Or she calls for certain equipment that's not all that common for the home baker. For example, she uses cake rings and acetate to assemble all of her cakes.  As a fairly regular baker who does not normally have those things on hand, I'd be pretty surprised if I found out that most home bakers do have a stockpile of acetate and an array of different sized cake rings in their kitchen cabinets. And yet to be fair, at the beginning of the book she does list out pretty much all of the ingredients that she uses and suggests locations to find them. But, my point is that more often than not--to make one of Christina Tosi's recipes--you can't necessarily just decide on a whim to whip one up on any given day.  There's a good chance that you're going to need to hit up the market or order something from Amazon to be able to make it--which in my mind isn't so traditional. Grant it, if you're a resourceful individual or a seasoned baker you can compensate or substitute for any number of the ingredients or equipment she specifies.  But again, I would argue that her recipes aren't exactly traditional--amazing yes--but not so commonplace.


Recipe courtesy of Momofuku Milk Bar

225g (2 sticks) unsalted butter at room temp.
300g (1 1/2c) granulated sugar
1 large egg at room temp.
225g (1 1/2c) all-purpose flour
45 (1/4c) corn flour OR if you don't have corn flour you can use 40g (1/4) flour + 8g (4tsp) freeze-dried corn powder
65g (2/3c) freeze-dried corn powder
3/4tsp baking powder
1/4tsp baking soda
1 1/2tsp kosher salt

-In a medium bowl, whisk together all of the dry ingredients EXCEPT the sugar
-In the bowl of a stand mixer using the paddle attachment, cream together the butter and sugar for 2-3 minutes on medium-high speed
-Add the egg to the butter-sugar mixture and beat for 7-8 minutes on medium speed
-Add the dry ingredients and mix on low speed just until well combined
-On a parchment or silicone lined baking sheet--for each cookie--measure out 1/3c of the cookie dough and then pat the tops of each cookie so it flattens a bit
-Wrap the tops of the baking sheets in plastic wrap and refrigerate for at least 1 hour or up to 1 week
-Before you are ready to bake the cookies, preheat the oven to 350 F
-Bake the cookies for 18 minutes or until they are lightly golden brown
-Remove cookies from oven and let them cool completely

Tuesday, July 8, 2014

Cookies and Cream Chocolate Towers


When I saw the picture for these I was immediately drawn into the recipe.  You can't deny their allure.  They look like triple stacked Oreos or something.  And who doesn't like Oreos?


No one.  That's who.  It's America's cookie.  That said, I actually do have one qualm with the Oreo.  Admittedly, I've never been all that "into" the cookie portion of it.  I'm more of a cream person.


In fact, my favorite type of Oreos are the double-stuffed ones.  The whole cookie-cream combo works great but the cream is what really shines through for me.  With that in mind, when I saw this recipe I was concerned that there was a whole lotta cookie in those towers.


Grant it, there's clearly a lot of cream too but like an Oreo--in my opinion--unless you have a double-stuffed one, the cookie over-powers the cream filling.  Plus, it's too crisp--I like a cookie with a softer edge.


But, after making these chocolate towers, I assumed wrong--for the most part.  Yes, the cookie does sorta over-power the cream but I didn't care when it comes to these cookies.  I didn't care because these cookies were tender and chocolatey and melt-in-your-mouth good--not anything like the Oreo.


I was afraid they were going to be crispy and upon biting into one, all of the amazing cream would be squeezed out.  But no.  Nope.  No way Jose.  The cookie is like a chocolatey soft sugar/butter cookie and it gently collapses when you bite into it--unlike the Oreo which tends to crack and crumble.


And the cream is light but sweet and plentiful.  It's a pure delight to eat.  So with that I encourage everyone to make these because yes they are tall but they are cute too. And they're better than the Oreo.


Recipe slightly adapted from Food & Wine

Chocolate cookies:

1 1/2 sticks unsalted butter softened at room temp.
3/4c powdered sugar
1 large egg at room temp.
1 tsp vanilla extract
3/4c unsweetened Dutch process cocoa powder
1/4 tsp salt
1 1/4c all-purpose flour

-In the bowl of a stand mixer fitted with a paddle attachement, beat the butter and sugar together until well combined
-Add the egg and vanilla and beat until well combined
-Add the cocoa powder and salt and mix until just combined
-Add the flour and mix until just combined
-Divide the dough into two discs and wrap each tightly in plastic wrap
-Refrigerate until firm--at least 1 hour--or overnight
-After the dough is firm, preheat the oven to 325F
-Line 2 cookie sheets with parchment paper or a silicone baking mat
-Roll out the dough onto a lightly floured clean surface
-Using a 2 1/2" round cookie/biscuit cutter, cut out at least 30 cookies
-Place cookies on the prepared baking sheets and bake for 10-12 minutes
-Remove from oven and let cool completely

Chocolate pastry cream:

1c half-and-half
3 large egg yolks
1/4c granulated sugar
1 1/2 tbsps all-purpose flour
1/8 tsp salt
3 oz semi-sweet chocolate melted
1 tsp vanilla extract

-Set a fine mesh strainer over a medium bowl and set aside
-In the bowl of a stand mixer with a whisk attachment, whisk the egg yolks, flour, sugar and salt together until pale and fluffy and then turn off mixer
-In a medium saucepan bring the half-and-half to an almost simmer--just heat until you see bubbles form around the edges of the pan and it starts to steam a bit
-When the half-and-half has started to steam, turn mixer back on low and slowly pour half of the warm half-and-half into the egg mixture and whisk until just combined
-Pour the egg/half-and-half mixture back into the saucepan with the rest of the half-and-half
-Put the saucepan back on the stove and heat over medium heat whisking constantly until the mixture has thickened and just starts to slowly bubble
-Remove the saucepan from the heat and pour in the melted chocolate and vanilla and whisk until fully combined
-Strain the pastry cream through the fine mesh strainer into a medium bowl
-Place a piece of plastic wrap directly over the pastry cream and refrigerate until it is completely cool and chilled--maybe 1 hour or so

Whipped Cream:

1c heavy cream
1 tsp powdered sugar
1 tsp vanilla extract

-In the bowl of stand mixer, whisk all of the ingredients on high speed until stiff peaks form

To assemble everything

-Transfer 3/4 of the whipped cream mixture to a small bowl and add 3 tbsps of the chocolate pastry cream to it and mix until fully combined and a light chocolate mixture forms
-Then take 3 separate pastry bags fitted with large plain tips and add the chocolate pastry cream to one, the light chocolate cream mixture to another and the whipped cream to the last
-Now lay out all 30 cookies onto a clean work surface
-Pipe the chocolate pastry cream onto 12 cookies--about a tablespoon of it
-Pipe the light chocolate cream onto 6 cookies--again about a tablespoon
-Pipe the whipped cream onto the remaining 12 cookies--another tablespoon or so
-Next stack the towers as illustrated:  Start with a chocolate pastry cream cookie, top it with light chocolate cream one followed by a whipped cream cookie and then another chocolate pastry cream cookie and lastly another whipped cream topped cookie.
-Lastly, pipe a dollop of the chocolate pastry cream onto the top of each cookie stack
-Refrigerate the cookie stacks for at least 6 hours to overnight until they are set
-Consume ravenously


Thursday, May 1, 2014

Ron de Jesus Reception


I have a friend who is on the board of the Ron de Jesus dance company here in Chicago.  And he recommended me to make some pastries/baked goods for a reception they were having after one of their performances.  So I agreed to do it.  Clearly I love baking so it was a great chance to make stuff I really like to make.  The reception was supposed to host somewhere around 70 people so I decided to make four different items because that seemed right in my head.  David Lebovitz--through his blog--introduced me to chocolate caramel tartlets.  Those were the first things I thought of making for this event.  They are small, easy and richer than a mofo.  Then I thought about eclairs because I've made them before too and I knew I could do it and make a lot of them with some confidence.  Also they are kind of fancy--or look fancy and you have a plethora of flavors that you can add to them.  I had a hard time at first figuring out what kind of eclairs I wanted to make but eventually I decided on two different flavors.


During my trip to Italy last year I came across Crema Pistacchi (a.k.a. pistachio spread).  I had never seen, tasted, or heard of it before but with a tiny sample of it that I got from a vendor selling it out on the street, I realized that I was addicted to it.  It's quite possibly the most wonderful thing you will ever taste--sent down from pistachio heaven.  So obviously I had to have it and thus I bought some--just a tiny 3.8 ounce jar of it.  It was amazing but it's also not cheap. Anyway, on my way back to the U.S. I figured I could just stow it in my carry-on because I wanted it close to me and I didn't want it to break which I was mega paranoid about.  But then I got flagged--or rather it got flagged--at airport security and I was told that either I had to throw it away because it was just over the amount allowed or...


OR...I could go back and re-check my bag that contained the tiny--but not tiny enough to get through security-- jar of  heavenly pistachio spread and go back through security.  I chose the latter.  I chose the latter because I figured I would clearly never come across this stuff again and it was my one and only chance to own this jar of amazingness.  In the end everything worked out and my pistachio spread came home with me unfettered.  I was pleased.  However, very shortly after I came back from Italy, Mario Batali's Eataly opened up in Chicago.  I trekked over there one day and amongst the various eateries that are contained within this mammoth establishment is also a small market.  So as I was perusing the market you'll never guess what I came across...  Yes, yes--jars and jars of Crema Pistacchi!  All small 3 ounce jars but nevertheless I felt like I had struck gold because this stuff is splendid and I had found a local source.  Praise be to Eataly! 


But getting back to my eclairs.  Eataly has other hard-to-find spreads that are all imported from Italy.  Another one that I found was hazelnut spread.  Not chocolate hazelnut spread like Nutella (which FYI they have a whole separate dedicated Nutella bar with all things Nutella) but more similar to the pistachio one and equally good.  So, after remembering all of this while trying to figure out what flavor of eclairs to make it occurred to me that the higher powers at be were easily convincing me to make pistachio and hazelnut flavored eclairs with a chocolate glaze.  It was so clear.  Obvi.  


For the other two desserts I knew I wanted one more fancy thing and then just a simple one because if I had to make four fancy ones for 70 people I might get a little too stressed.  Also, I wanted to make a cake because cake is the best but I didn't think a whole cake would be appropriate at an event like this.  But then I remembered financiers.


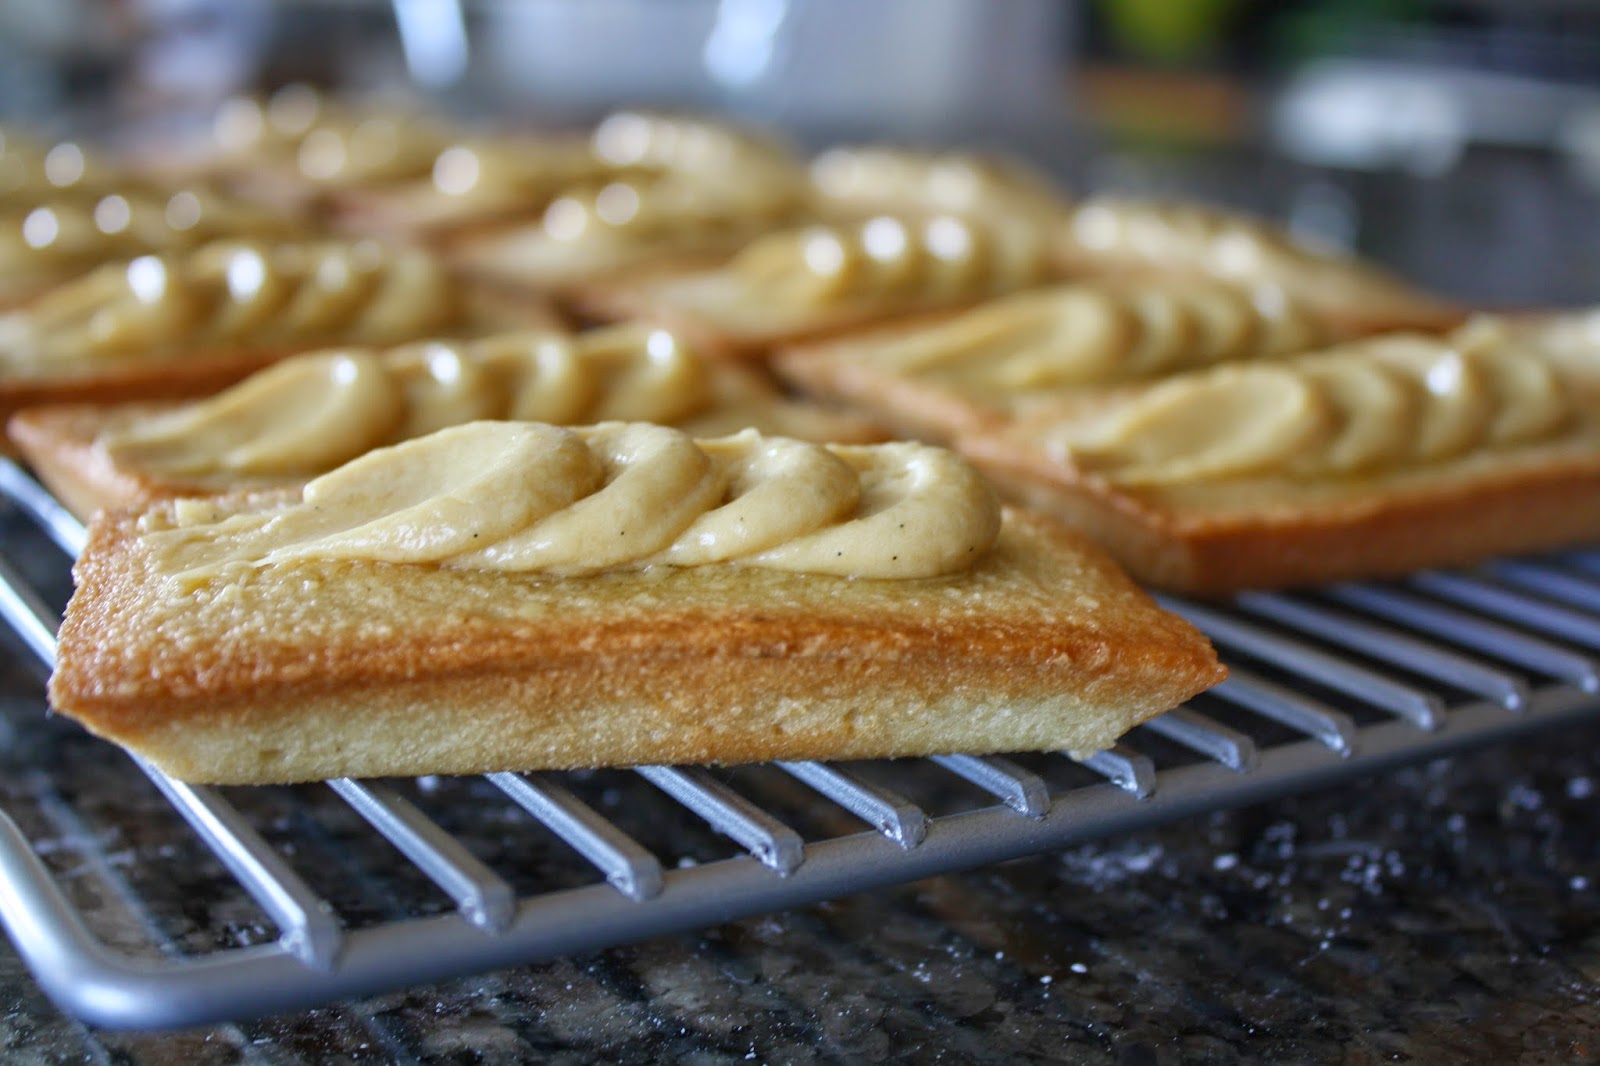
Financiers are little almond tea cakes.  They are very easy to make.  I had made chocolate ones before which turned out well but I wanted to make non-chocolate ones this time since I already had other chocolate items on the menu.  My Bouchon Bakery cookbook had a recipe that I wanted to try out.  Traditionally--from what I've read--financiers were made into small rectangular loaves that look kind of like gold bars after they've been baked. The fact that they look like gold bars some how relates to the origin of their name:  financiers ===> gold ===> money...stuff like that I guess.  I didn't investigate the issue much but I learned something, you've learned something so that's nice.  Anyway, you can make them in mini muffin pans too which I had done before but I wanted to make these cool little bars and decorate them with buttercream petals.


I found a place online that's in Philadelphia that sells sheet pans with the molds for them but after ordering one, realizing it was the wrong size, then re-ordering the right sized one and having it delivered overnight I made a visit to Sur la Table and found out that they sell individual molds there that were the same price as the ones I bought online but cheaper with no shipping.  So I bought them too because I was mega paranoid again and feared that my other molds that I had over-nighted wouldn't really be over-nighted and I needed a back-up.  But I was wrong and needless to say I can make a lot of financiers now. 


The last item was a sable cookie.  In general, I think cookies are the easiest things to make.  A sable is just a butter/sugar roll-out cookie.  I found a great recipe on Smitten Kitchen that was a snap to make so I went with it and then pressed some pearl sugar into it.  The one adaptation I did make was the vanilla bean I added.  I read that if you scrape the seeds into the sugar of a recipe and rub it into the sugar crystals all that great vanilla flavor is fully and truly embedded within the sugar.  I guess by rubbing different herbs and spices into the sugar of a recipe it will really enhance the flavor.  More learning.  As cliche as it may sound, this whole process was really a learning experience.


The biggest worry I had with this project was getting everything done on time and with my own approval.  The only way I knew I could make it work was by making one or two components of recipes every night after I got home from work.  I did this for a week before the event.  I ended up freezing a lot of things so that they would stay fresh.  The two things I felt like I could only finish the day of the event were the eclairs and the financiers.  I made the eclair shells and the pastry cream a few days before and froze the shells and refrigerated the pastry cream.  But I felt like if I had filled them a day or two before they would be soggy and gross.  So I waited for that.  Also, the financiers were a bit tricky only because I kept reading that they are really only good the day that they are baked--one source said only within a few hours...  I was silently freaking out about his.  But I tested the recipe a few times before I made them and decided that they tasted fine throughout the whole day.  Also, one thing I read that helped was that the batter can be made beforehand and refrigerated--which apparently also helps to let all of the flavors marinade.  So I made the batter the night before and baked them on the day of the event which worked out well.


As far as sprucing each of the desserts up was concerned, I wanted to keep it simple--mostly.  For the cookies a lot of recipes suggest using "dusting" sugar to coat them.  I found this at a few stores but I also had some pearl sugar sitting unopened in my cabinets for months--saving it for a recipe that I have yet to make.  So I decided to just use that.  For the eclairs, I had mixed the respective nut spreads into the pastry cream but figured I needed some sort of identifier outside of the pastry cream. This came in the form of the respective nut (hazelnut and pistachio)-- in a crushed form sprinkled over the chocolate glaze-- that each eclair housed within its doughy interior.


I actually wanted to dye some modeling white chocolate a pistachio color and a hazelnut color and overlay some fancy design on each eclair but I didn't have the time..  Nonetheless, I think they looked good.  The chocolate caramel tartlets were easy with just sprinkling some fleur de sel atop.  With the financiers--often people will just sprinkle some powdered sugar on them or set some fruit within the batter which I'm sure is delicious but I love cake and buttercream frosting so I wanted to pipe some butterceam on them--specifically a Biscoff flavored French buttercream.  I also had a clear vision of using that petal technique that I've used before--perhaps over-used. It just seemed right...


Everything turned out well.  I write that with a good amount of surety. The woman that I was coordinating with for the event sent me a nice message the day after it and said that everything went well and the desserts were a big hit.  So that was nice to know.


I'm not sure what I would do differently next time.  Aside from some kinks I thought I was pretty organized and prepared.  I do think that working in a kitchen for hours on end it a tough job--I don't know that I could do that on a daily basis because I'm exhausted from  my measly one week stint--grant it I was working my full time gig simultaneously. But still, I think baking professionally isn't an easy way to make a living.  I love cake.