I can't express the joys of making puff pastry and having it turn out perfect. I can't express them because I've never had it happen to me. But at the same time I've only made it twice in my life. It's fun actually--time consuming--but fun. Anyway, the two times I have tried it, I did with two different recipes. The most recent, which pertains to this post, was from my Bouchon Bakery cookbook.

As a side note, I am really enjoying this cookbook. It's photos are pristine and mouth-watering and the recipes that I have made have not disappointed in the least bit. That said, many of the things that I have made take time. Like I really need to read the whole recipe before I decide to make it so that I know if I can get it done that day or two days later. There's a lot of thought and care that goes into making these recipes. As a side side note, I knew--from my past experience--that making puff pastry does take time but the recipe from this book takes even more time. There's a lot chilling and resting going on. And I had a bit of trouble this time around and I think it had a lot to do with the one thing you can't let happen when you are making puff pastry: The butter began to melt.

Yes, and it's not as though my apartment was super hot too. I blame it partly on the butter that I used. I used what I understood to be--and still believe is--a good quality European style butter (Kerrygold). But the thing with this butter is that it just seems too soft and it melts faster than a crappier butter. I think I used a lesser quality butter last time--although truth be told I can't recall for sure. I just know that I didn't have a butter melting problem last time. So anyway, every time I began taking the dough out to roll and fold, a little bit of butter would melt and smear into the dough. I felt helpless. Sad. Mad. Not glad. Yet I trudged along hoping for the best and realizing I wouldn't find out the true damage until I made something with the dough.

That was the other small predicament I found myself in. It's one project just to make the puff pastry. It's another to figure out what to do with it once you've got it. So again I turned to the laborious yet beautiful Bouchon Bakery cookbook and decided on the Mille-feuille a.k.a. Napoleon.

It's really a brilliant concoction this Mille-feuille. It's so rich. It has four layers of puff pastry sandwiching three layers of mousseline cream topped with whipped cream. Damn. Right? And that mousseline cream is luxuriant--I could easily eat a bowl of it. And then some.

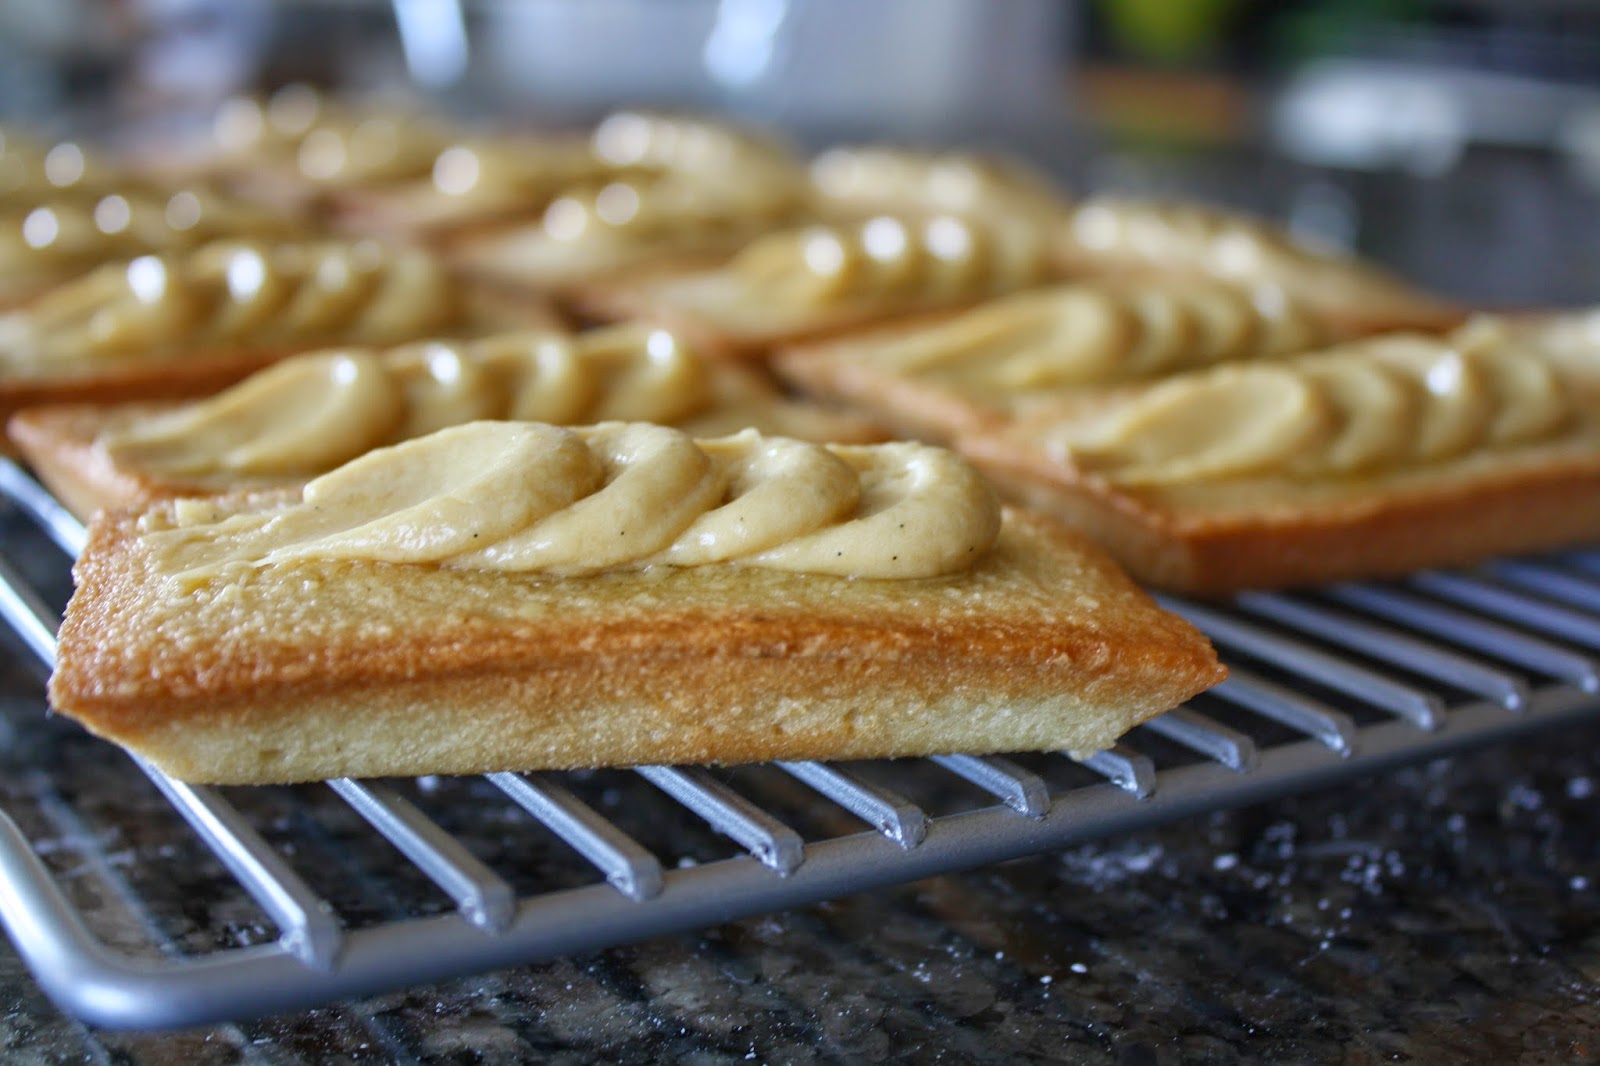
Once you have the puff pastry and the mousseline cream made, it's fairly easy to put together. You can start by making the cream which is basically vanilla pastry cream and buttercream mixed together. Then, get the puff pastry ready by rolling it out onto a baking sheet and weighing it down with as much weight as possible so the puff pastry doesn't "puff" up a lot. Seems kinda wrong right? Not letting puff pastry puff? But the purpose is to create really thin sheets of puff pastry that have many many flaky layers squeezed in them. And generally it worked. But remember that butter melting problem I mentioned earlier? Well I found the damage that it caused which is visible in my photographs. Notice, if you will, the second pastry layer from the right. It doesn't look flaky. It looks like a big clump of dough which is basically what it is. Again, sad. But, the other layers seem to have turned out great! So, not that sad.

Also, something that you'll notice about this particular Mille-feuille is that it is turned on it's side so that the layers are side by side. Typically they are turned so that the layers are on top of one another like a sandwich. But not this one. This one is constructed on it's side per Bouchon Bakery instructions. I read that it is done this way because the pastry chef felt that with the traditional way you always end up squeezing out the mousseline cream when you pierce through it with a fork or bite down on it. Although I can see the logic in this, and perhaps it is through my own misdoings in making the pastry, but it's not exactly easy to eat it this way too. It's a little difficult to cut through the pastry. It's flaky but not easily destructible and unless you're eating it with a fork and knife the cream still manages to ooze out between the pastry layers. So, maybe my pastry wasn't tender enough. I don't know. Either way this is one really good dessert.
Recipe ever so slightly adapted from Bouchon Bakery
What you need:
600g puff pastry
375g pastry cream
375g buttercream
300g whipped cream
Pastry Cream
132g egg yolks
1 1/2 tsps of vanilla bean paste or extract
110g granulated sugar
50g all-purpose flour
550g whole milk
27g room temp. butter cut in 1/2" pieces
-Set up an ice bath and place a clean medium bowl in the bath
-Place the egg yolks in the bowl of a stand mixer fitted with a whisk attachment and pour in the vanilla
-Whisk on low speed for about 30 seconds and then slowly add the sugar
-Increase the speed to medium-high and whisk until the yolks have lightened up in color--about 1 1/2 minutes
-Scrape down the bowl
-Turn the mixer back on to medium-high and whisk until it's thickened and even lighter in color
-Reduce the speed to low and add the flour and whisk for another 30 seconds or until fully combined
-With the mixer running, slowly pour in the milk and mix until combined
-Strain the mixture through a fine mesh strainer into a large saucepan
-Set pan over medium heat while whisking constantly until the mixture thickens and simmers, very slow bubbles just start to pop at the surface
-Pour the mixture into the bowl that is sitting in the bath and whisk in the butter
-Press a piece of plastic wrap on the surface of the pastry cream and set aside to cool/refrigerate until ready to use
Buttercream
75g egg whites
150g + 33g granulated sugar divided
42g water
227g unsalted butter at room temp. and cut into pieces
-Place the egg whites in the bowl of a stand mixer fitted with a whisk attachment
-Place the water and 150g of sugar in a small saucepan and stir until combined
-Bring the sugar/water to simmer over medium-high heat
-When the temperature of the syrup reaches 230 degrees F, turn the mixer on medium speed and gradually pour in the remaining sugar
-Whip the egg whites until they form soft peaks. If the syrup has not yet reached 248 degrees F and the egg whites have formed soft peaks then turn the mixer to the lowest setting and continue to cook the syrup until it reaches 248 degrees F.
-Once the temperature of the syrup reaches 248, remove the pan from the heat and slowly pour the syrup into the mixer while the mixer is still running at its low setting
-After the syrup is in, increase the speed to high and whisk until the bottom of the bowl is at room temperature and the egg whites have formed stiff peaks
-When the egg whites are cool, put the mixer back on its low setting and start adding the butter one piece at a time--adding the next piece only after the previous one is fully combined within the mixture
-When the buttercream is at the proper consistency, turn off the mixture and set it aside or refrigerate it.
Note: I didn't end up using all of the butter--I think I had a quarter of it left over when it started coming together.
Whipped Cream
150g heavy cream
5g powdered sugar
1 1/2 tsps vanilla bean paste or extract
Place everything in the bowl of a stand mixer and whisk on medium speed until the mixture seems stiff enough to pipe through a pastry bag
Mousseline Cream
Pastry cream
Buttercream
-Place a piece of parchment paper on the bottom of a 9x13 jelly roll pan
-Place the pastry cream in the bowl of a stand mixer fitted with a whisk attachment and whisk until smooth
-Add the buttercream and whisk until fully combined
-Pour the mixture into the jelly roll pan and with an offset spatula smooth and even it out
-Place it in the freezer overnight
For the puff pastry dough
-Roll out the puff pastry to the size of a 12x16 jelly roll pan and trim it to fit in it
-Freeze the dough for an hour
-After an hour preheat the oven to 350 degrees F
-Once the oven is preheated, remove the dough from the freezer and place another piece of parchment paper on top of the dough
-Place the same or as similar as you have sized baking sheet on top of the dough and weigh it down as evenly as possible. This is to prevent it form puffing up.
-Bake for one hour and ten minutes or until the bottom of the dough is golden brown
-Remove pastry from oven and remove the other baking sheet and any applied weights
-Invert the pastry on another sheet pan, place a piece of parchment paper on top of that and then another sheet pan to continue to weigh it down
-Put it back in the oven for another ten minutes
-After ten minutes, remove the sheet pan that is weighing the pastry down and the piece of parchment paper sitting on top and bake for an additional eight to ten minutes
-Remove from oven and let cool
Note: When baking the pastry you might want to place another sheet pan or something below the sheet pan holding the dough to catch any butter that might seep out. I didn't do this and to this day every time I use my oven it smokes from all of the grease sitting at the bottom of it (Yes, I need to clean it)
Putting it all together
-Take the cooled pastry and trim it to a 10x12 rectangle
-Then, cut it lengthwise into 4 strips each 2 1/2 inches wide
-Remove the mousseline cream from the freezer and invert the sheet of cream onto a cutting board
-Cut the mousseline cream to match the size of the strips of pastry
-Once everything is cut to size, lay flat a piece of pastry, then lay a strip of mousseline cream on top of that and continue with another piece of pastry, then cream etc... until you have what you something like you see in my pictures
-After you have everything all sandwiched together, turn the whole thing on its side and with a serrated knife, trim about a half inch off on each end.
-Pipe the whipped cream on top to whatever pattern or design of your choosing--I did the petal thing because that's all I know. In the Bouchon Bakery book, he does something else which is fancy and nice--beyond my grasp at this stage..
See? A ton of steps!