Thursday, May 1, 2014

Ron de Jesus Reception


I have a friend who is on the board of the Ron de Jesus dance company here in Chicago.  And he recommended me to make some pastries/baked goods for a reception they were having after one of their performances.  So I agreed to do it.  Clearly I love baking so it was a great chance to make stuff I really like to make.  The reception was supposed to host somewhere around 70 people so I decided to make four different items because that seemed right in my head.  David Lebovitz--through his blog--introduced me to chocolate caramel tartlets.  Those were the first things I thought of making for this event.  They are small, easy and richer than a mofo.  Then I thought about eclairs because I've made them before too and I knew I could do it and make a lot of them with some confidence.  Also they are kind of fancy--or look fancy and you have a plethora of flavors that you can add to them.  I had a hard time at first figuring out what kind of eclairs I wanted to make but eventually I decided on two different flavors.


During my trip to Italy last year I came across Crema Pistacchi (a.k.a. pistachio spread).  I had never seen, tasted, or heard of it before but with a tiny sample of it that I got from a vendor selling it out on the street, I realized that I was addicted to it.  It's quite possibly the most wonderful thing you will ever taste--sent down from pistachio heaven.  So obviously I had to have it and thus I bought some--just a tiny 3.8 ounce jar of it.  It was amazing but it's also not cheap. Anyway, on my way back to the U.S. I figured I could just stow it in my carry-on because I wanted it close to me and I didn't want it to break which I was mega paranoid about.  But then I got flagged--or rather it got flagged--at airport security and I was told that either I had to throw it away because it was just over the amount allowed or...


OR...I could go back and re-check my bag that contained the tiny--but not tiny enough to get through security-- jar of  heavenly pistachio spread and go back through security.  I chose the latter.  I chose the latter because I figured I would clearly never come across this stuff again and it was my one and only chance to own this jar of amazingness.  In the end everything worked out and my pistachio spread came home with me unfettered.  I was pleased.  However, very shortly after I came back from Italy, Mario Batali's Eataly opened up in Chicago.  I trekked over there one day and amongst the various eateries that are contained within this mammoth establishment is also a small market.  So as I was perusing the market you'll never guess what I came across...  Yes, yes--jars and jars of Crema Pistacchi!  All small 3 ounce jars but nevertheless I felt like I had struck gold because this stuff is splendid and I had found a local source.  Praise be to Eataly! 


But getting back to my eclairs.  Eataly has other hard-to-find spreads that are all imported from Italy.  Another one that I found was hazelnut spread.  Not chocolate hazelnut spread like Nutella (which FYI they have a whole separate dedicated Nutella bar with all things Nutella) but more similar to the pistachio one and equally good.  So, after remembering all of this while trying to figure out what flavor of eclairs to make it occurred to me that the higher powers at be were easily convincing me to make pistachio and hazelnut flavored eclairs with a chocolate glaze.  It was so clear.  Obvi.  


For the other two desserts I knew I wanted one more fancy thing and then just a simple one because if I had to make four fancy ones for 70 people I might get a little too stressed.  Also, I wanted to make a cake because cake is the best but I didn't think a whole cake would be appropriate at an event like this.  But then I remembered financiers.


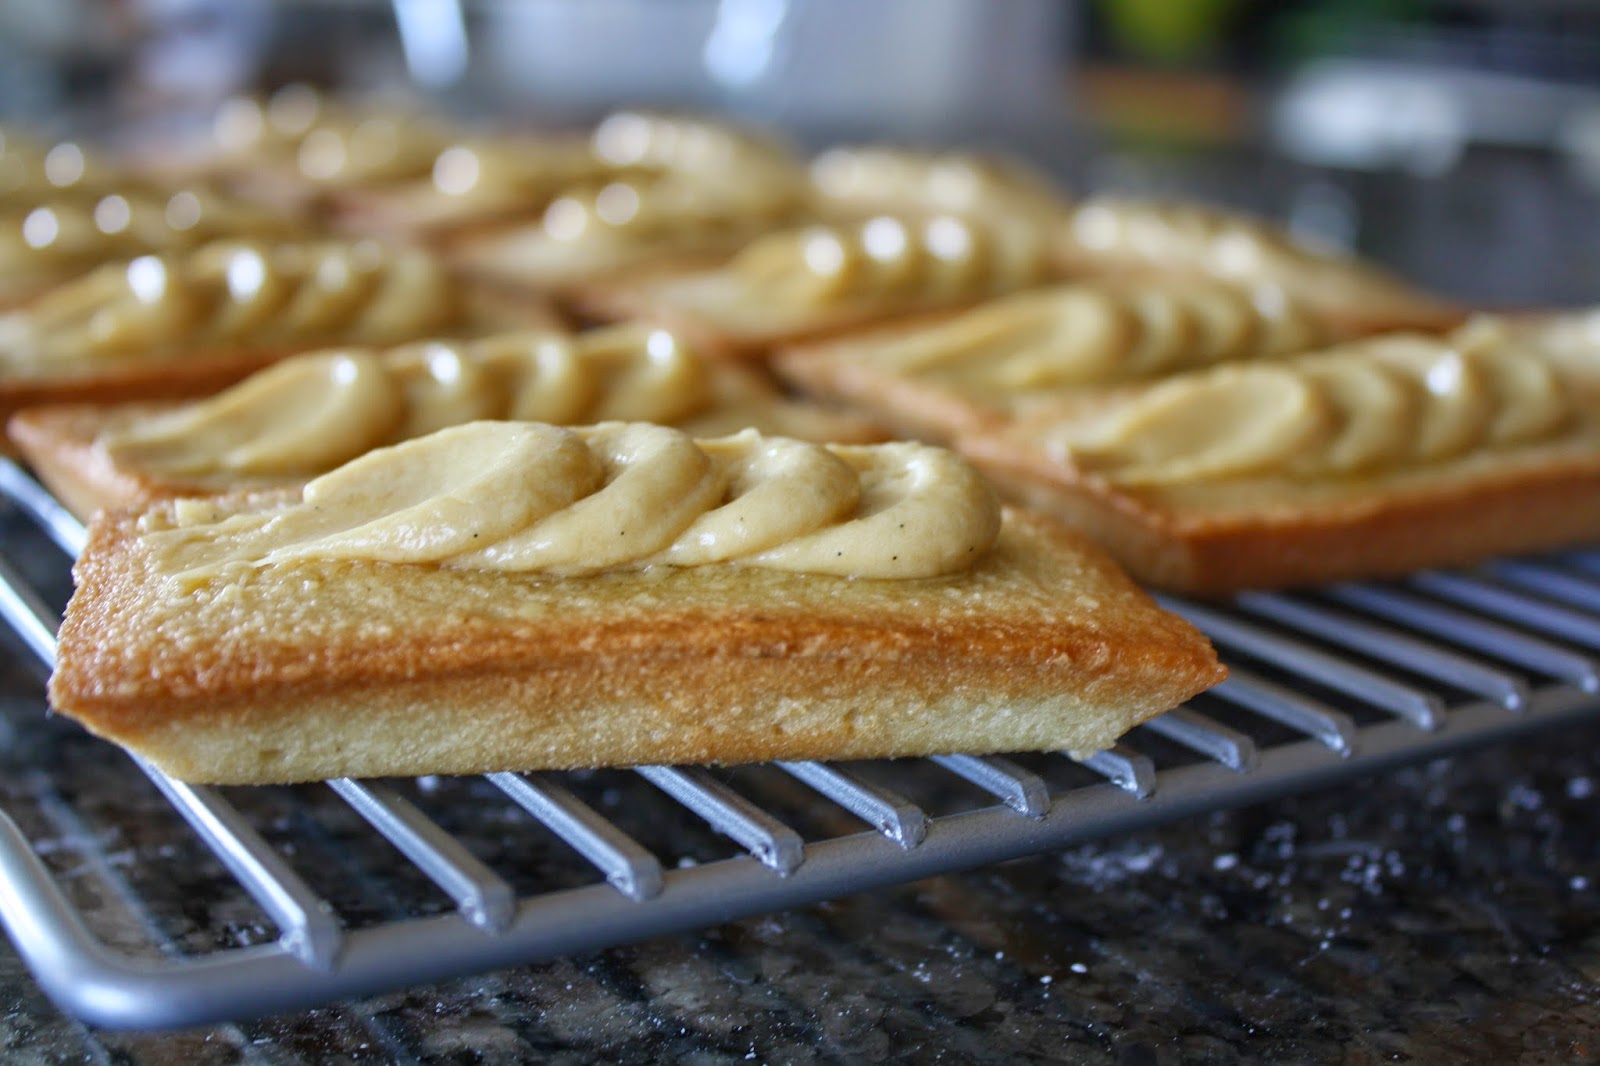
Financiers are little almond tea cakes.  They are very easy to make.  I had made chocolate ones before which turned out well but I wanted to make non-chocolate ones this time since I already had other chocolate items on the menu.  My Bouchon Bakery cookbook had a recipe that I wanted to try out.  Traditionally--from what I've read--financiers were made into small rectangular loaves that look kind of like gold bars after they've been baked. The fact that they look like gold bars some how relates to the origin of their name:  financiers ===> gold ===> money...stuff like that I guess.  I didn't investigate the issue much but I learned something, you've learned something so that's nice.  Anyway, you can make them in mini muffin pans too which I had done before but I wanted to make these cool little bars and decorate them with buttercream petals.


I found a place online that's in Philadelphia that sells sheet pans with the molds for them but after ordering one, realizing it was the wrong size, then re-ordering the right sized one and having it delivered overnight I made a visit to Sur la Table and found out that they sell individual molds there that were the same price as the ones I bought online but cheaper with no shipping.  So I bought them too because I was mega paranoid again and feared that my other molds that I had over-nighted wouldn't really be over-nighted and I needed a back-up.  But I was wrong and needless to say I can make a lot of financiers now. 


The last item was a sable cookie.  In general, I think cookies are the easiest things to make.  A sable is just a butter/sugar roll-out cookie.  I found a great recipe on Smitten Kitchen that was a snap to make so I went with it and then pressed some pearl sugar into it.  The one adaptation I did make was the vanilla bean I added.  I read that if you scrape the seeds into the sugar of a recipe and rub it into the sugar crystals all that great vanilla flavor is fully and truly embedded within the sugar.  I guess by rubbing different herbs and spices into the sugar of a recipe it will really enhance the flavor.  More learning.  As cliche as it may sound, this whole process was really a learning experience.


The biggest worry I had with this project was getting everything done on time and with my own approval.  The only way I knew I could make it work was by making one or two components of recipes every night after I got home from work.  I did this for a week before the event.  I ended up freezing a lot of things so that they would stay fresh.  The two things I felt like I could only finish the day of the event were the eclairs and the financiers.  I made the eclair shells and the pastry cream a few days before and froze the shells and refrigerated the pastry cream.  But I felt like if I had filled them a day or two before they would be soggy and gross.  So I waited for that.  Also, the financiers were a bit tricky only because I kept reading that they are really only good the day that they are baked--one source said only within a few hours...  I was silently freaking out about his.  But I tested the recipe a few times before I made them and decided that they tasted fine throughout the whole day.  Also, one thing I read that helped was that the batter can be made beforehand and refrigerated--which apparently also helps to let all of the flavors marinade.  So I made the batter the night before and baked them on the day of the event which worked out well.

As far as sprucing each of the desserts up was concerned, I wanted to keep it simple--mostly.  For the cookies a lot of recipes suggest using "dusting" sugar to coat them.  I found this at a few stores but I also had some pearl sugar sitting unopened in my cabinets for months--saving it for a recipe that I have yet to make.  So I decided to just use that.  For the eclairs, I had mixed the respective nut spreads into the pastry cream but figured I needed some sort of identifier outside of the pastry cream. This came in the form of the respective nut (hazelnut and pistachio)-- in a crushed form sprinkled over the chocolate glaze-- that each eclair housed within its doughy interior.


I actually wanted to dye some modeling white chocolate a pistachio color and a hazelnut color and overlay some fancy design on each eclair but I didn't have the time..  Nonetheless, I think they looked good.  The chocolate caramel tartlets were easy with just sprinkling some fleur de sel atop.  With the financiers--often people will just sprinkle some powdered sugar on them or set some fruit within the batter which I'm sure is delicious but I love cake and buttercream frosting so I wanted to pipe some butterceam on them--specifically a Biscoff flavored French buttercream.  I also had a clear vision of using that petal technique that I've used before--perhaps over-used. It just seemed right...


Everything turned out well.  I write that with a good amount of surety. The woman that I was coordinating with for the event sent me a nice message the day after it and said that everything went well and the desserts were a big hit.  So that was nice to know.


I'm not sure what I would do differently next time.  Aside from some kinks I thought I was pretty organized and prepared.  I do think that working in a kitchen for hours on end it a tough job--I don't know that I could do that on a daily basis because I'm exhausted from  my measly one week stint--grant it I was working my full time gig simultaneously. But still, I think baking professionally isn't an easy way to make a living.  I love cake.


Tuesday, April 15, 2014

Coffee Crunch Cake


I have a giant list of things I want to make and it grows daily.  It sits in my e-mail inbox and on post-it notes pasted to a little notebook I keep alongside my recipe books. 


But this past weekend I had the hardest time trying to pick out something I felt like making from that list.  I had zero motivation to make any of it for some reason.  So again I turned to one of my cookbooks which saved me.  And my savior came in the form of a cake--a rolled cake to be precise.  It called out to me.  It said, "make me bitch."  And I complied.


I haven't made a ton of rolled cakes.  I am a little afraid of them because they can crack when you roll them--and I've had that happen to me.  And for someone who can be anal-retentive about his baked goods not turning out just so--it's a painful experience.


I've been known to throw them out in a fit of rage...  Well, maybe not rage, but extreme irritability.  However my new Vintage Cakes cookbook has a whole chapter dedicated to rolled cakes and I've made two of them so far.  The first was a vertically rolled cake.  I know, vertically rolled!!!??? What the F is that?   Well, think...tornado.


Inevitably I'll make it again and post--it was good.  It had alcohol in it.  And the second is documented above and below.  Both have come out close to perfect in that they haven't cracked when I rolled them.  Hooray...


Actually, not only did this one not crack, it was really easy to work with and really soft--like really soft.  All of these rolled cakes in this cookbook seem soft and light--that's the simplest way to describe them.  The one contrasting element was the "coffee crunch" which was basically just coffee candy.  It was easy to make but I think it was too much--like the amount.  You could probably do with half of it or three quarters.  But it really did provide a nice "crunch" which I guess was the point.  The filling was coffee flavored whipped cream--again another light touch...  Overall the cake was superb--


Recipe slightly adapted from Vintage Cakes by Julie Richardson:


Crunch Topping

-2tsp baking soda
-1tbsp finely ground coffee beans (I didn't have any so I cracked open one of my K-cups and scooped out the ground coffee--seemed to work just fine)
-1 1/2c granulated sugar (10 1/2oz)
-1/4c light corn syrup
-1/4c dark coffee

Cake

-1c sifted cake flour (4oz)
-1tsp baking powder
-1/2tsp fine sea salt 
-1c granulated sugar (7oz)
-1/3c canola oil
-4 egg yolks at room temp.
-1/3c water
-1tsp vanilla extract
-6 egg whites at room temp.
-1/4 tsp cream of tartar

Filling

-1tbsp instant espresso (I used Sanka)
-2c heavy cream
-1/3c granulated sugar (2 1/2oz)
2 tbsps Kahlua or 2tsp of vanilla extract

For the crunch:

-Oil a large baking sheet very well and set it next to the stove.  
-Sift the baking soda and ground coffee together in a small bowl and set that near the stove as well
-In a medium, as tall as you have, heavy bottomed sauce pan mix the sugar, corn syrup and coffee and set over medium heat stirring often until the sugar dissolves
-Stop stirring and heat until the temperature reaches 290 F.  As the temperature gets closer to 275 F, give the pan a swirl to evenly distribute the mixture and to prevent any burning
-When the temperature reaches 290, remove from the heat and stir in the coffee/baking soda mixture.  It will foam up a lot but keep stirring until it is fully incorporated
-Once the ground coffee/baking soda is fully incorporated pour the mixture into the greased baking sheet but do not spread it out--let is set on its own
-Let the coffee crunch cool completely--about an hour--and then use a rolling pin or a hammer and break it up into tiny pieces and set it aside

For the cake:

-Grease a 12x16 inch jelly roll pan and line the bottom with a piece of parchment paper and then grease the parchment paper as well
-Center an oven rack and preheat the oven to 325 F
-In a large bowl sift and thoroughly whisk together the flour, baking powder, salt and 3/4 of the sugar
-In a small bowl whisk together the egg yolks, oil, water and vanilla
-Add the wet ingredients to the dry and stir until the they are just fully combined--don't over-mix
-Next, in the bowl of a stand mixer fitted with a whisk whip the egg whites on medium speed until frothy
-Add the cream of tartar and increase the speed to high 
-Once soft peaks have formed decrease the speed to medium and slowly and steadily add the remaining 1/4c of sugar
-Increase the speed back to high and whip until firm shiny peaks have formed
-Then fold about 1/3 of the egg whites into the cake batter until no more white streaks are visible
-Fold in the remaining egg whites gently until evenly combined and there aren't any white streaks
-Pour the batter in the jelly roll pan and smooth it out
-Bake for 16-18 minutes until the cake springs back when touched lightly
-Remove from the oven and let cool completely

Make the filling:

-Whisk the espresso powder (Sanka in my case) and 1/2c of the heavy cream together in a small bowl
-In a cold bowl of a stand mixer, whisk the remaining heavy cream and the espresso/cream mixture on medium-low gradually turning up to high
-When it looks like the whisk is leaving tracks into the whipped cream add the sugar in a steady stream while the mixer is still running
-Mix until soft peaks form and then add the Kahlua or vanilla and mix until just combined

For assembling the cake:

-Spread half of the filling on the cake leaving about 1/4" along the edges free of any whipped cream
-With the short side of the cake facing you, use the parchment paper that the cake is laying atop and slowly and carefully roll the cake away from you forming a roll
-Once rolled, lay the cake with the seam side down on whatever cake plate you are going to use
-Trim the ends
-Spread the rest of the filling on top of the cake and on the sides
-Finally, if you are going to serve the cake soon, spread the coffee crunch all over the cake.  If not, don't spread the coffee crunch over the cake because according to the cookbook the moisture from the whipped cream with make the coffee crunch chewy after a few hours.  Thus lightly wrap the cake in the plastic wrap and refrigerate until ready to serve--then sprinkle it with coffee crunch.


Sunday, April 6, 2014

Buttermilk Pie


Spring is slowly--and I stress the word slowly--making its way back into our lives.  This pleases me.  But at the same time I'm a little scared that due to our extreme arctic winter the rhubarb and asparagus are going to be a little late or absent from the party.  I guess there's always Whole Foods... 


Yet, I'm still a little bummed because I bought a couple of new cookbooks with some gift cards I received on Christmas.  By the way, I'm "into" cookbooks now--I wasn't really before.  Normally I scour the internet for recipes and I forget about the many cookbooks that I do have which I think is a misstep on my part.  Cookbooks usually have drool worthy photographs and make nice coffee table pieces.  But they also have some drool worthy recipes.


Anyway...I am a little upset because one of the new books has a chapter for each of the four seasons and although spring is technically here,  most of them are recipes that require spring fruits that aren't.  And I know I could go to the grocery store and buy anything I needed but I have been trying to do all of my produce shopping at the farmers market for the past few years because I think buying locally is a great way to support local farms and businesses.  I also like the idea of using seasonal ingredients as much as possible and shopping at the farmers market is a great way to do just that.  So I do my best to adhere to it.  Pretentious?  Maybe.


But since none of the produce specified in the 'Spring' chapter of this cookbooks is being sold at the farmers market, I did the next most sensible thing which was flipping ahead to the 'Fall' recipes and finding something that didn't require anything I didn't already have on hand.  And what I had on hand was a lot of buttermilk.  A lot of buttermilk that I did not foresee me using for anything else in the near future.  And so in the 'Fall' chapter is a recipe for Buttermilk Pie (why that is considered a Fall dessert is something I don't know but I'll go with it).  I'd never eaten a buttermilk pie and it had a pretty picture so I made it.


The recipe called for some lemon zest and egg yolks along with the buttermilk.  So it actually turned out to be more like a lemon chess pie.  I've never had a lemon chess pie but I've had a chess pie and I imagine that if I combined some lemon and a chess pie this is what it would taste like except the lemon flavor was much more subdued.  Yet, that is the best way to describe it.  It also had a pecan crust which I really hated rolling out but loved the taste.  It was sweet and tasted like a cookie.

This is my filterified night shot!


Pecan Crust:

1c all purpose flour
1/3c pecans
3 tbsp granulated sugar
1/2 tsp salt
4 tbsp cold unsalted butter cut into 1/4" cubes
1 large egg

-In a food processor, combine all of the dry ingredients until the pecans are finely ground
-Add the butter and the egg and pulse just until when pinched it will hold together but does not form a ball
-Drop the dough onto some plastic wrap, form it into a disc, wrap it up tightly and refrigerate for at least an hour
-Roll out the dough on a floured surface, place into a 9" pie plate and trim/fold/crimp excess dough to your liking at the rim of the pie plate.
-Refrigerate dough in pie plate for at least another hour
-After the hour is up, preheat the oven to 400 F
-Line the pie plate with parchment paper and then add some pie weights or dried beans to hold the dough down while blind baking 
-Bake the pie crust for 15 minutes and then remove the parchment paper and pie weights
-Place pie back in the oven for another 10 minutes or until the crust is golden brown
-Remove the pie crust from the oven and reduce the oven temperature to 325 F

*A note about this pie dough:  It tastes great but I found it temperamental to work with/roll out particularly.  It was very sticky and kept coming apart on me so I had to do a little more patching than I would have liked.  So, I would recommend letting the pie crust chill for a lot longer than just 1 hour.  Also I was using my brand new marble rolling pin which may have had a part to play.  Nevertheless I seem to have trouble with pie crust recipes that include an egg anyway so that might have also had something to do with it.

Filling

1 1/4c granulated sugar
3 tbsp corn starch
3 large eggs
6 tbsp unsalted butter melted and cooled
1 1/3c buttermilk
1 tsp grated lemon zest
1/2 freshly grated nutmeg
pecans for garnish (optional)

-Using the food processor again, pulse the sugar and corn starch until combined
-Add everything else and process until well combined
-Pour the mixture into the pie shell and bake for 55 minutes to 1 hour until filling is set and slightly jiggly in the middle
-Remove from oven, let cool and garnish with powdered sugar, pecans or not 
-Serve at room temperature or chilled

*One final note about making the filling:  I used a 9" pie shell and the filling was too much so I couldn't have used all of it or else it would have over-flowed out of the shell.  Also, if you don't have a food processor you could have easily just whisked everything together in a large bowl.  I do have one and used it but it's a medium-sized one--I think-- (I don't know how big... :-/)  but it wasn't big enough so I ended up transferring it to a large bowl and just whisking until everything was well combined.


Saturday, March 15, 2014

Macaroons


Coconut was one of those things that grew on me.  I never liked it as a kid.  I have no idea when I started liking it.  Maybe it was when I tried one of those Girl Scout Samoas?  But I don't know why I would have tried one if I didn't like coconut.  


I guess I just gave it a try for the hell of it?  Maybe I was just drunk.  My taste palate may be be expanding as I grow older but my memory certainly is not.  In any case, I like it now--like a lot.  


And I think I had certainly seen mararoons around at bakeries and in grocery stores but I had never tried one--most likely because I thought I hated coconut.  


But then one day I was at Julius Meinl getting some coffee and they had these pyramid-shaped things dipped in chocolate sitting in a jar at the front counter.  


I asked what they were, was like oh yeah I like coconut now and purchased one.  


I think I was also about to drive up to my parents house in the suburbs and thought it was would be a good treat to eat on the way.  


Well I was right.  It was toasty on the outside and sorta gooey and sweet inside.  I have no idea why I never like coconut before because these macaroons were intensely likeable. 


So like most sweet things I try or see, I decided I wanted to try and make them myself.  I found a recipe on Serious Eats that I love and it's so darn easy.  It calls for unsweetened coconut which is what I use but they also have one for sweetened coconut if you can't find the former.


That's the other thing about them, they are the easiest things to make.  I can tell you now--all they are are coconut, sugar, egg whites, vanilla and a pinch of salt.  Then maybe you can mix in some mini chocolate chips or dip them in chocolate.  They are a ssssnap to make.


Macaroons - makes about 12

6 oz of unsweetened coconut
6 oz granulated sugar
2 egg whites
1 tsp vanilla extract
pinch of salt
Optional - 1 c mini chocolate chips
Optional - 4 oz of chocolate for dipping


Optional step 1 - spread the coconut on a baking sheet and toast them until they are golden brown

Step 2 - Pre-heat the oven to 350 degrees F

Step 3 - Using a large bowl, mix everything together with your hands--yes, your hands.  Get all in there with them until everything is thoroughly combine.  If you are using the mini chocolate chips then add them in there at his time as well.

Step 4 - Use about 2 tbsp of the mixture.  Form them into mounds or if you have some sort of mold you can use that.  The bakery where I found them has them formed into pyramids which you need a special mold for.  Recently I found such a mold made my Ateco at Sur la Table which worked great.  You can also use a mini-muffin pan which I have done before and works great.  In any case spread each mound--if not using a muffin pan--on a baking sheet about 2 inches apart.  Bake for 13-15 minutes or until golden brown.

Step 5 - Remove from the oven and let cool completely.  

After they are done you can dip them in some chocolate--tempered or not.

Wednesday, February 26, 2014

Gâteau Basque


Winter sucks.  This winter sucks big time.  I mean...W.T.Frack?


I'm tired of the unrelenting frigid temperatures, the snow, the ice.  I'm tired of talking about it.  Of hearing about it, of feeling blah every time I look out the window.


I'm also sick of complaining about it.


So about this cake...


Gâteau Basque.  It originates--from what I've read--from the Basque regions of Spain and France--I guess both sides have a version.


I came to know this cake from a cafe/bakery I frequent.  It's Cafe Floriole (check it out--they really make some amazing pastries).  Anyway they make a gâteau basque too and it is my favorite pastry they have.


It comes as a 4" cake dusted with powdered sugar and filled with cherry preserves (usually).  It's decadent and rich.  I mean, normally I can polish off a giant slice of cake all on my own and then some.


I also refuse to share my desserts--that's like sacrilege to me.  But this cake is so rich that I have to share it which is disappointing to me because it has surely been sent down from heaven.  And I'm selfish.  As far as desserts go.

First comes the bottom layer of cake batter...

So, ever since I first tried it I put it on my list of things to get busy with in the kitchen.  And I did.

Then the lemon curd...

About eight months ago when I had an abundance of cherries.

Then the pastry cream with my less than stellar spiral...

 I found a recipe for a gâteau basque.

And finally the top layer of cake batter with an egg wash

I found some different recipes actually--most had cherry preserves and pastry cream nestled in the middle of the cake while others just had the preserves.


I know for sure that the one at Floriole has the preserves but I can't tell whether or not it has pastry cream--I think not but I could be wrong.  Nevertheless, I picked out a recipe and made it as 4" little cakes just using preserves.  The result was good and tasted delectable but it wasn't anything like the ones I knew.  It was more like a pastry (almost pie crust-like) dough than a cake batter.


And the one at Floriole is more like a cake--moist (I'm not afraid of that word) and dense"ish."  So I decided to try again and I finally found a recipe that seemed to have more of a cake batter ratio which was less like the other ones I tried but which also appeared to be more of a better fit.  I just didn't make it until now for some reason--when cherries are far from plentiful in these parts.


Thus I decided to make a slight adaptation and make a Meyer lemon (those are in season somewhere) curd to replace the preserves.  This recipe also included a vanilla pastry cream so I implemented that as well which was a blessed addition indeed.  As a whole this an awesome recipe.  It was really close to the one I have come to love at Floriole.  It was definitely more cakey and had a similar look although I did make it in a 10" (maybe a 9") springform pan instead of the little 4" ones.  The lemon curd replacement was pretty good too I have to say but I'm looking forward to trying it with some cherry preserves. 


I made this into a 2 day process because I needed to make the lemon curd and the pastry cream first.  You could definitely do it all in one day but I was taking my time I suppose.

Lemon curd - recipe from Joy of Cooking

Supposed to make about 1 1/2c which was accurate

3 large eggs
1/3c sugar
grated zest of 1 lemon
1/2c of strained lemon juice (I used Meyer lemons)
6 tbsp of unsalted butter cut into small cubes
1/2 tsp of vanilla extract

-Whisk the eggs, sugar and lemon zest in a medium sauce pan until the color of the eggs is lighter
-Add the lemon juice and the butter
-Over medium heat whisk the ingredients together constantly until the butter has melted and the mixture thickens (So, I believe I removed the mixture from the heat too quickly because it wasn't thick enough when it cooled.  Therefore I had to put it back on the heat until it thickened up more.  But I think I left it on the heat too long because it thickened well enough but once it cooled it had a slightly grainy texture. It didn't effect the overall finished product but the moral of the story is keep the curd on the heat long enough until it is the thickness of a custard)
-Once the curd has thickened, remove it from the heat and stir in the vanilla extract.
-Transfer the curd to a clean bowl and let cool completely.  It should thicken up a bit more as it cools.

Pastry cream - recipe also from Joy of Cooking

Makes about 2c

1/3c sugar
2 tbsp all-purpose flour
2 tbsp corn starch
4 large egg yolks
1 1/3c milk (I used skim)
3/4 tsp of vanilla extract (I used vanilla bean paste)

-Using a stand mixer with the whisk attachment on high speed--mix the sugar, flour, corn starch and egg yolks until thickened and very pale yellow in color
-Heat the milk in a medium saucepan over medium heat until it begins to simmer
-Remove the milk from the heat and pour 1/3 of it into the egg mixture whisking constantly until fully combined
-Pour the egg-milk mixture back into the sauce pan with the rest of the warm milk and place back on the stove over low to medium heat and whisk constantly until it has thickened (whisk constantly else you will risk burning some of the pastry cream) and started bubbling
-Remove the pastry cream from the heat and using a wire mesh strainer, strain it over a clean bowl
-Stir in the vanilla extract
-Place a piece of wax paper directly atop the mixture while it cools

Gâteau Basque adapted from The Travelers Lunchbox

3/4c (90g) almond flour
1 1/3c (200g) all-purpose flour
1 tsp baking powder
1 tsp salt
3 large eggs at room temp.
1c (200g) sugar
1 tbsp vanilla extract or vanilla bean paste
14 tbsp (1 3/4 sticks, 200g) unsalted butter melted
1 egg for an egg wash

-Butter and flour a 10" spring form cake pan and set aside
-Sift the flour, almond flour, baking powder and salt in medium bowl and then whisk together thoroughly
-Using a stand mixer--with the whisk attachment--whisk together the eggs, sugar and vanilla until thickened and pale in color
-Add the melted butter and whisk until combined
-Whisk in the dry ingredients until just combined
-Let the mixture stand for 20 minutes and preheat the oven to 400 F
-After the 20 minutes are up and the oven is preheated, pour half of the cake batter into the spring form pan and smooth and even out with a spatula
-Pour and even out the cooled lemon curd leaving about an inch around the outer edge
-Pipe or just pour and smooth out the cooled pastry cream over the lemon curd
-Pour, smooth and even out the rest of the cake batter and then apply the egg wash to the top of the cake
-Bake for 40-45 minutes until the top is golden brown and a toothpick stuck into the middle of the cake comes out clean
-Remove the cake from the oven and let cool completely before removing from the pan
-Dust some powdered sugar over it if it so pleases you
-Eat


Tuesday, February 4, 2014

Winter Soup


Surprise!  I made something savory again.  Believe it?  No?  Well whatever.  I did.  Nevertheless, I haven't been entirely excited about this post.  In fact I've been less than motivated about writing it.  It wasn't bad at all and as soup goes it was pretty darn good.  But, I'm just not a big soup eater.  Never really have been and I'm not sure why.


Maybe it's because they're never really all that filling for me and you're really just eating liquid.  Eh.  But there are definitely some good soups out there--and chowders too.  I like a thick tomato soup but gag at the thought of a creamy mushroom soup.  No.  Thanks.


But this soup is good, easy and fun to make because there's a good amount of peeling/chopping vegetable prep work and then you just pile it in one pot, cook it, puree it and then you're done.


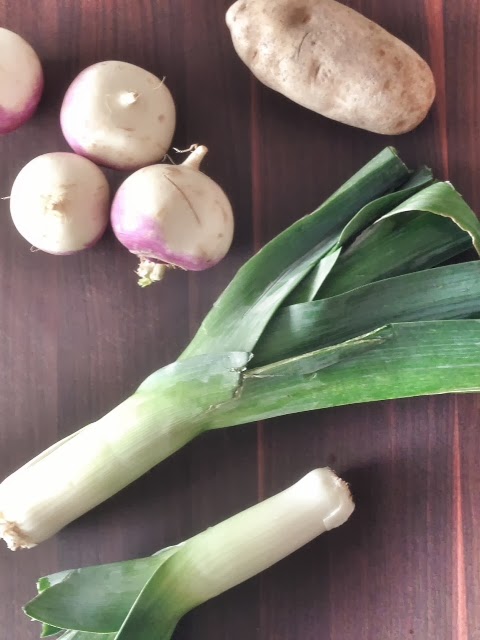
Since it's winter and all that I can get at the farmers market is root vegetables I searched for a winter soup recipe and I found one that was published in the NYT for turnips, leeks and potatoes.


I followed the recipe pretty closely with a few exceptions which were either a result of me not having everything or me liking salty things.


So here goes my slightly adapted recipe from here:

1 tbsp EVO
1 medium onion chopped
2 large leeks halved and then 1/4" sliced (only the white and light green parts)
2 tsps salt
2 garlic cloves minced
1 large russet potato chopped into 1/4-1/2 inch cubes
4 large turnips chopped into 1/4-1/2 inch cubes (recipe calls for 2lbs but I had maybe 1 1/2lbs and it didn't seem to be a problem)
2 quarts of chicken stock
1 bay leaf
4 sprigs of fresh parsley
1/4 tsp ground pepper

4 slices of bacon fried and crumbled for garnish
fresh parsley for garnish

-Heat the olive oil in large dutch oven (at least a 5 quart)
-Add the onion, leeks and a pinch of salt (separate from the 2 tsps listed above) and stir until all soft--about 5 minutes
-Add the garlic and stir in for about 30 seconds
-Add everything else and bring to a full boil uncovered
-Reduce the heat to low, cover the pot and cook for 45 minutes
-Test that the vegetables are tender and soft--try piercing them with a fork and if the fork pierces right through easily they're done.
-Remove the pot from the heat and working in batches spoon the vegetables and some liquid (I didn't incorporate all of the liquid into the final product--I think it just depends on how soupy you want it to be--I wanted my kinda thick so I maybe used only about half of the liquid) into a blender or food processor and puree until completely smooth
-Serve immediately or store in an airtight container for a week at most?  Or freeze it.

When I served it I sprinkled some of the crumbled bacon atop the soup--it was a great addition.