Showing posts with label Pies and Tarts. Show all posts

Friday, February 5, 2016

Lemon Tart with Coconut Crust


In my neck of the woods, citrus is about the only fruit available during the frigid winter months.  And if I really didn't like citrus, I'd probably be mad about that.  Luckily I do like it--quite a bit in fact.  Its got that tart bite that I find refreshing during the bleak winter months--and they're tropical fruits that hint at the warmth from which they are borne.  And I fantasize about that warmth.  My all time favorite citrus dessert is key lime pie.  My ideal one has a tooth-achingly sweet and salty graham cracker crust that cuts up the key lime filling.    

I found a recipe for a key lime tart in Alice Medrich's Flavor Flours.  Unfortunately, I only had lemons on hand and no condensed milk so I couldn't make it.  But, I could use the recipe for the crust. Not surprisingly--since this particular recipe book explores baking using just about any flour other than wheat flours--it doesn't call for my beloved graham cracker crust.  Instead, it pairs itself with another tropical fruit, the coconut. Both shredded coconut and coconut flour join forces to create the base for this tart.  The result is essentially a crust that tastes like a macaroon.  And since the recipe for the crust is just about the same as one for macaroons, it's not all that shocking.  The only difference is that it uses coconut flour. I think macaroons are pretty amazing so eating a crust in the form of a giant one is by no means a chore.  

My only trouble with making this coconut crust was that it wasn't exactly the most structurally sound crust.  Macaroons are crispy on the outside and chewy on the inside.  But this crust was just chewy all over.  So when I cut into the tart, it was more pliable than anything else so I never got a clean cut.  I always ended up having to scrape off some of the crust from the bottom of the pan.  Nevertheless, I think that if I baked it a bit longer, that issue would have been resolved.  

In my mind, pairing two tropical fruits like this just seems to make perfect sense.  And truly, they go together well--it was an excellent crust.  I'm not saying I'm going to totally give up on a graham cracker crust for a key lime pie but it's certainly a nice alternative to have in your back pocket.  


Recipe

Crust via Alice Medrich's Flavor Flours

40g (1/3c) coconut flour
100g (1c + 1T) unsweetened shredded coconut
1/4 tsp baking powder
1/2 tsp salt
85g (6T) unsalted butter at room temp. and softened
100g (1/2c) granulated sugar
1 large egg white

First, preheat the oven to 350 F and then grease a 9 inch tart pan with a removable bottom.  Next, using a large bowl combine all of the ingredients together until everything is well incorporated. After that, press the mixture into the bottom and sides of the tart pan--making sure that every inch is covered well and that the sides of the pan are thicker than the base.  Place the tart pan on a baking sheet and bake it in the oven for at least 15 minutes.  I baked mine for 15 minutes and I felt that it wasn't done so maybe in the time range between 15-20 minutes depending upon your oven.  I would touch the bottom of the crust and if it seems fairly firm then it will probably be good.  Once, the crust has baked, remove it from the oven and let it cool completely before making the filling.

Filling

100g (1/2) granulated sugar
2T corn starch
1/8 tsp salt
1/2c water
1/4c milk
2 large egg yolks (save the whites for the meringue)
1T unsalted butter
1/4c fresh lemon juice
1 tsp lemon zest

First, preheat the oven to 350 F.  Then using a small bowl, whisk together the egg yolks until lighter in color and set it aside.  In a medium saucepan, combine the sugar, corn starch, salt, water and milk. Set the mixture over medium heat and whisk constantly until the mixture just comes to a boil. Remove the saucepan from the heat and pour about a third of the mixture into the egg yolks and quickly whisk to combine. Pour that mixture back into the saucepan with the rest of the milk mixture. Set it over low heat while whisking constantly and cook just until it thickens and it starts to slowly bubble. Remove it from the heat and add the butter, lemon juice and lemon zest and whisk to combine.  Place a piece of plastic wrap over the surface of the filling and set aside while you make the meringue.

Meringue

2 large egg whites
50g (1/4c) granulated sugar

In the bowl of a stand mixer using the whisk attachment, start whisking the egg whites on medium speed until they are foamy.  Then slowly start pouring in the sugar.  Whisk the whites on medium-high speed until stiff glossy peak form.  Set the meringue aside while you assemble everything.

Assembly

Pour the slightly cooled filling into the cooled tart shell and make sure it's evenly distributed.  Next, either spread the entire meringue over the tart or pour it into a piping baking with a plain tip and pipe any sort of design you wish.  Once that's done, bake the tart for about 12-15 minutes until it is set and the meringue peaks have just started to brown.  Remove the tart from the oven and let it cool completely before slicing into.


Saturday, November 7, 2015

Red Wine Poached Pear Tarts


This is such a simple dessert.  Puff pastry and fruit.  That's it.


Of course you can dress it up a bit in any number of ways.  But if you didn't, the buttery flaky puff pastry and sweet ripe fruit would hardly be a disappointment in itself.  On the other hand, there's certainly no harm in sprucing it up.


Like maybe you can poach some pears in a sweet red wine syrup and let them marinade in the red wine syrup for a few days in the refrigerator.


Then cut some squares of puff pastry out, slice up the poached pears and place them on top of the pastry and bake them.  It's still pretty uncomplicated--assuming you have some readily available puff pastry.


I like that it's not too sweet either.  Buttery? You betcha.  But not that sweet because the sweetness really just comes from the fruit and the syrup that the pears are poached in.


I might even go as far as designating this is a healthy dessert.  But I won't.  Because it's really not healthy--I mean there's a lot of butter in that puff pastry.  So it's not healthy--but it's damn good.


Recipe

2-2 1/2 pounds puff pastry dough
4 medium red wine poached pears (recipe follows)
1/4c of granulated sugar
1 egg and 1 tsp of water for the egg wash

For the red wine poached pears:

2 1//2c dry red wine--I used a cabernet
1/4c granulated sugar
1 cinnamon stick
pinch of cloves
4 firm medium pears peeled--ripe but still fairly firm

Using a 3 quart saucepan, combine the wine, sugar, cinnamon stick and cloves.  Place the saucepan on the stove and bring the mixture to a boil over medium high heat.  Once it has come to a boil, reduce the heat to a simmer and gently add the pears.  Cook the pears for 15-20 minutes in the simmering liquid--turning the pears every so often so that each pear is evenly cooked and colored by the red wine poaching liquid.  Make sure not to overcook the pears so that they are still firm once they are evenly colored.  If at any point they seem to be getting mushy, remove the pears and poaching liquid from the heat.  In any case, once they are fully cooked, remove the saucepan from the heat, place the pears so that they are sitting upright in the pan and let them cook completely.  After the pears have cooled, place them and all of the poaching liquid in an airtight container, cover and refrigerate for at least 24 hours and up to 3-4 days.

When the pears have sat in the poaching liquid for at least 24 hours, get ready to bake the tarts.  First, line two large baking sheets with either silicone baking mats or parchment paper and set them aside. Then, on a well floured surface roll out the puff pastry into at least an 8 inch wide by 16 inch long by 1/8 inch thick rectangle.  Cut eight 4 inch by 4 inch rectangles out of the larger rectangle and place four of them on one baking sheet and the other four on the other baking sheet.  Cover the baking sheets with plastic wrap and place them in the refrigerator while you get the pears ready.  Next, slice each pear into 1/8 inch thick slices--discarding any of the core pieces.  Once that's done place oven racks in the lower and upper third sections of your oven and preheat it to 450 F.  Remove the baking sheets from the refrigerator, distribute the pear slices evenly between the eight pastry squares and arrange them in any way you prefer.  After the pears slices have been arranged, sprinkle the sugar over each tart.  Then, in a small bowl whisk together the egg and water.  Using a pastry brush, brush the tops of the exposed pastry that borders the fruit--not the sides of it.  Finally, place one baking sheet in the upper and one in the lower rack.  Bake them for 20 minutes at 450 F switching the two baking sheets between the two racks after the first 10 minutes.  After the first 20 minutes of baking, decrease the oven temperature to 400 F, switch the baking sheets again between the two racks and bake them for another 20 minutes switching the baking sheets between the two racks one more time halfway through the second 20 minute period.  Confused?  Well, just switch up the baking sheets every once in a while to ensure that they bake evenly since they are on separate oven racks.  Anyway, after a total cooking time of 40 minutes remove the baking sheets from the oven and let them cool completely.  Enjoy.


Tuesday, August 25, 2015

Almond Berry Tarts


I’ve recently discovered how to make my own almond cream.  And how I can replace the almonds with pistachios or hazelnuts or pecans…  Basically, a whole new world full of joy has just been revealed to me.  And with summer fruit season in full swing, it’s fairly inevitable that I should pair the two. 


It’s funny because pastry chefs have been using almond creams and pistachio creams to do just that for a while and I’ve probably been eating them often enough but never realized precisely the bliss my taste buds were experiencing.  But now I know.  And I’ve been putting this knowledge to good use lately.  


I read about almond cream from Dorie Greenspan in Baking Chez Moi and while she was discussing it, she offered up the tidbit of replacing the almonds with other nuts like pistachios.  So I actually made pistachio cream first.  And I fell in love with it.  Then I tried a pecan cream and was equally smitten.  In fact, I made two galletes with  some fresh summer fruit—one with pistachio cream and one with pecan cream.  If not for some technical difficulties (new camera coupled with some personal technical density) they both would have probably made it onto my blog.  Nevertheless, I come here bearing a new product with almond cream—one of the tree nuts I had yet to try my hand at.  And it did not disappoint either.  I paired the almond cream with some raspberries and blackberries and threw them both into some partially-baked pâte sablée.  The entire combination wasn’t too sweet or rich—it was pretty right on.  


Admittedly, I think I prefer the pistachio and pecan creams over the almond cream.  But it’s not as though I’d ever pass on an almond one—it’s pretty delicious nonetheless.  The great thing about these recipes is that they are super easy to make—professional pastry chefs use them all of the time and that’s probably because they’re equally delicious and easy to make.  That said, I certainly don’t think this is something that the every day baker couldn’t or shouldn’t tackle.  It’s an amazing addition to spruce of a fruit tart at any time of the year.


Recipe

Pâte sablée from Baking Chez Moi by Dorie Greenspan (enough dough for 1 double crust pie for a standard 9 inch pie pan or six 4 inch individual tart pans with some dough still leftover)

408g (3 cups) all purpose flour
120g (1 cup) confectioners sugar
1/2 tsp sea salt
256g (18 T) chilled unsalted butter and cut into small quarter-inch cubes
2 large egg yolks

First, butter your tarts pans and set aside.  Then, prepare the dough.  You can do this in a food processor or by hand.  I did mine in my food processor so here's how that went...  Place the flour, sugar and salt in the bowl of the food processor and pulse to combine.  Place the butter in the food processor and pulse until the mixture has clumps the size of peas--you may need to manually stir the mixture up a bit to make sure the butter has been distributed evenly.  Add the egg yolks and pulse until they have fully moistened the dough.  Remove the dough from the bowl of the food processor and place it on a work surface.  Lightly knead it just to make sure there aren't any dry bits leftover. After that, you can either roll the dough out and place it into the tart pans or press it into the pans.  I pressed my into the pans--which I found to be easier.  Once the pans are lined with dough, prick the bottoms of each tart pan all over with a fork.  Place the tart pans on a large baking sheet, cover it with plastic wrap and then place the pan into the refrigerator to chill until you're ready to par-bake them.

Almond Cream from Baking Chez Moi by Dorie Greenspan

85g (6 T) unsalted butter at room temp.
132g (2/3 cup) granulated sugar
75g (3/4 cup) almond flour
2 tsp all purpose flour
1 tsp corn starch
1 large egg
2 tsp vanilla extract

Place the butter into the bowl of a stand mixer.  Attach the bowl to the mixer and using the paddle attachment, beat the butter on medium-high speed until it's creamy--1-2 minutes.  Then, add the sugar to the bowl and beat the butter and sugar together on medium-high speed until the mixture is light and fluffy--3-5 minutes.  Add the flours and corn starch and beat until fully combined.  Next, add the egg and beat until it has been fully combined--making sure to scrape down the sides and bottom of the bowl so that all of the ingredients have been thoroughly combined.  Lastly, add the vanilla and beat until it has been combined.  Store the almond cream in an air tight container in the refrigerator until read to use.

Assembly

1 - 1 1/2 cups of fresh raspberries and blackberries

First, par-bake the dough-lined tart pans.  Preheat the oven to 400 F.  Line each dough-lined tart pan with parchment paper and fill each one with pie weights.  Bake them for about 12-15 minutes and then remove them from the oven to cool completely--and remove the pie weights and parchment paper.  Once the par-baked dough is completely cool, preheat the oven to 350 F.  Then, divide up the almond cream evenly between each pan and spread it evenly over the bottom of each one. Divide up the berries between the tart pans and spread them atop the almond cream.  Bake the tarts for 30-45 minutes or until the almond cream has puffed up and slightly browned.  Remove the tarts from the oven and let cool.  


Thursday, August 21, 2014

Peach (and blueberry) Cobbler


I almost made a crisp--not a cobbler.  I actually wasn't sure what the difference was until I read about it online.  A cobbler has a biscuit topping and is called a cobbler because when the biscuits are baked they look like cobblestones.


Well I thought that was great and all but I like a sweet brown sugary streusel more. Biscuits are good but they aren't as sweet in my opinion and are tad more involved to make.


So when I decided I wanted to make a cobbler and then actually realized what one was...I was like..."F" that! But then I simmered down and decided that it might be a good experience to actually make a cobbler.  Plus, I might like it more than I was anticipating.


I found a recipe in the cookbook that I have--the one that divides recipes according to the four seasons, The Beekman 1802 Heirloom Dessert Cookbook.


Its been a great cookbook to me. Every time I think of a classic dessert I want to make, I flip through it and--so far--find what I'm looking for. The one thing about this recipe is that although it's named "Peach Cobbler," it has some blueberries in it.


So I don't know if that's an actual "classic" peach cobbler or not.  But I wasn't opposed to it--blueberries are a great addition to just about any fruit dessert.


And the biscuit topping that I thought would be a little more intensive than a crisp's crumble topping really wasn't bad.  You just cut some butter into the flour, add some buttermilk, cut some circles out of the dough and then drop it on top of the fruit.  Easy as pie--or cobbler in this case.


Recipe ever so slightly adapted from The Beekman 1802 Heirloom Dessert Cookbook:

Filling:

1 1/2 lbs peaches sliced into 1/4-1/2 inch wedges and peeled if you want--I didn't (I used a combination of white and regular)
1c blueberries
1/4c granulated sugar
1/4c packed brown sugar
3T corn starch
1/2 tsp ground cinnamon
1/8 tsp ground allspice
1/4 tsp salt

Biscuit topping:

1 1/4c all purpose flour
3 T granulated sugar
1 tsp baking powder
1/2 tsp baking soda
1/2 tsp salt
5 T cold unsalted butter cut into small cubes--divided
1/2c buttermilk
1 tsp vanilla extract
coarse sugar for sprinkling

-In a large bowl, combine all of the filling ingredients and toss well so that all of the fruit is well coated
-Pour the filling into an 8x8 inch baking pan and set aside
-Preheat the oven to 375 F
-For the biscuit topping, in a large bowl sift together all of the dry ingredients
-Using a pastry blender, your fingers or two forks, cut in 4T of the butter into the flour mixture until it resembles coarse cornmeal or "pea-sized" chunks
-Add the buttermilk and vanilla and stir to combine
-On a lightly floured surface roll out the biscuit topping so that it is about 1/2" thick
-Using a 2 1/4" round biscuit cutter or cookie cutter of some sort, cut out 9 rounds--or as many as you can
-Drop the rounds of dough atop the filling
-Sprinkle the coarse sugar over the dough and the remaining butter over the entire pan
-Bake for 30-35 minutes or until the biscuits are golden brown and the filling is bubbling
-Remove from oven and let it cool a bit--but serve warm and maybe with some whipped cream?  Like I did?  Yeah!

Sunday, August 10, 2014

Raspberry and Chocolate Tarts


Basically I made these for two reasons:  I wanted to make use of these little tart pans I purchased that I feel I don't use enough--and by making these I can justify my purchase.  The second reason is that I wanted to make something fancy looking with raspberries.


I have to say that making pie dough turns me into a nervous wreck.  The temperature in my apartment does not fall below 75 degrees during the summer so I'm sweating something fierce rolling it out in a frenzied fashion and attempting to prevent any butter from melting into the dough.  But I have a system in place which involves a pizza stone and the energy inefficient method of opening and closing my freezer door every 5 minutes or so.  Gotta keep that shit cold!  You know??  You know.  


So making 6 little pie doughs can be extra nerve-wracking.  It's not like I can roll out the dough once and cut out 6 individual circles.  In one roll I can only get 3 and then you have to clump the scraps back together without working it too much so you don't get a tough pie crust all the while keeping it cold. It's a mad dash to the finish.  


But I manage and luckily my system--however inefficient may be--seemed to work this time.  The pastry dough is the hardest part about these tarts.  The rest is just melting chocolate and putting some raspberries on top of it.  And I did add a glaze for the raspberries to make them shine a bit.


I really love the taste of chocolate and raspberries together in one bite.  It's sweet and sour and maybe even a little bitter.  Delicious.  I don't have a lot more to say about these so I'll leave it at this--these are easy but fancy and they taste fantastic so I'd go for it.  Love yourself.  But love these tarts more.


Recipe for 6 - 4" tarts

Pie dough:
Your favorite pie crust recipe--enough for a top and bottom crust for a 9" pie

Chocolate ganache:
10 oz of semi-sweet chocolate
1c of heavy cream

Raspberries:
As many as you want--I used 8 for each tart so 48 total

Simple sugar glaze:
50g water
50g sugar
25g lemon juice
3g pectin

-Roll out pie dough and cut out 6 - 5" circles
-Line the tart pans with the dough
-Line each tart with parchment paper and pie weights
-Place all of the tarts on a baking sheet and refrigerate while you preheat the oven to 350 F
-Bake the tart shells for 18-20 minutes or until they are golden brown
-Remove from oven and let cool completely
-Meanwhile make the ganache
-Place the chocolate in a large heatproof bowl
-Place the heavy cream in a small saucepan and heat to the point where it's just about to boil--small bubbles will form around the edge of the saucepan
-Remove the cream from the heat and pour it over the chocolate
-Whisk together the cream and chocolate until all of the chocolate is fully melted and it's a silky smooth mixture
-Divide the ganache equally between the tarts
-Place the tarts in the fridge until the ganache is set
-Once set, remove from fridge and prep the raspberries by washing and drying them with water
-Divide the raspberries evenly between the tarts and just set them atop the ganache
-To make the glaze, combine all of the ingredients in a saucepan and boil for 3 minutes
-Remove the glaze from the heat and with a pastry brush, glaze all of the strawberries--while the glaze is still warm
-The glaze should set pretty quickly so when it does you are done!


Tuesday, July 29, 2014

Cherry Pie


Admittedly--to memory--this was my first cherry pie.  Which is interesting because I really do like cherries. But then when I was making my pie, my mom called and I told her what I was making and she asked why. She told me that she thought I never liked cherries and admitted that she never did.  So maybe that explains why I've never had a cherry pie...


Nevertheless, with it being my first one I have eaten or made, I have to say that I wasn't fully impressed at first.  But I'm also not sure if mine turned out exactly how it was supposed to.  Strike that, I'm almost certain it didn't.  It tasted great--perfect amount of sweetness.  But I think the texture and togetherness of the whole thing was askew.  The filling should have been thicker.  Right?


I used fresh cherries that I got that same day at the farmers market.  They were beautifully ripe and sweet and juicy. Like really juicy.  And I think that may have been my pitfall because I poured all of that juice into the pie crust and it never thickened up with the added corn starch and sugar.  All it did was make a soggy bottom crust and a lot of leftover liquid sitting in the pie pan after I cut the first slice out.  It kind of blows because I was excited about this summer pie.  I even bought a cherry pitter--which by the by worked fantastically--to ease my cherry pie making time.  It was going to be a great pie.  But it was just ok....at first.


Then it was great pie!  Sometimes--with pies--I feel as though they taste better as they age.  I don't mean age as in weeks or months but just a couple of days later and they taste even better.  It's as though all of the pie ingredients have marinaded and melded together and are in perfect harmony.  Also, the filling seemed to thicken up a bit which was awesome.  Still, it probably should have been thicker at the outset but since it was my first cherry pie, I'm not going to mull over what should have been.


Recipe adapted a tad from Simply Recipes:

1 - 9" or 10" pie dough recipe of your choosing--enough for a top and bottom crust (I used this one from Saveur again)

Pie Filling

2lbs (~4c) sweet cherries pitted and possibly drained of excess juice?
100g (1/2c) granulated sugar
1/2tsp almond extract
2T lemon juice
3T corn starch

Egg Wash

1 large egg
1T water

Course sugar for sprinkling

-Roll out the bottom crust for the pie dough and set within your pie pan and then stick it in the fridge while you get your filling together
-In a large bowl, mix all of the filling ingredients together until well combined and the cherries are fully coated
-Set filling aside
-Roll out your top crust (I made a lattice using a tutorial from Simply Recipes)
-Remove pie pan from the fridge and pour the filling inside
-Place your top crust over the filling and trim, crimp and pinch to your liking (Note about pie dough trimming: On a small edge of my pie, there was a portion that I didn't trim enough so it was cantilevering off of the edge of the pie pan.  So when I stuck it in the oven, it drooped over the edge and was like a waterfall of pie crust over the edge of the pie pan.  Thus, lesson learned:  Trim your pie dough just to the edge of your pan to avoid this droop)
-Place pie in the fridge while you preheat the oven to 425 F
-Once the oven is preheated, brush the top crust with the egg wash, sprinkle the course sugar on top and place the pie pan on top of a baking sheet to catch any juices that may drip down.  Bake pie for 15 minutes
-After the 15 minutes is up, reduce the oven temperature to 350 F and bake for another 30-35 minutes or until the top crust is golden brown and the juices are bubbling and, ideally, thickened
-Remove from oven and let cool completely

Wednesday, June 4, 2014

Rhubarb Hand Pies


I could go on and on about how big of a pain in the ass making pie crust can be but this time it turned out pretty good so I just won't go there.  Instead I'll remark on the ease at which these seem to disappear after they're introduced to a bunch of people at a barbeque and the joy it was to finally get some rhubarb and make something with it.  


I've actually made 3 rhubarb desserts since it started showing up at the farmers market.  


These hand pies, a rhubarb crisp and a white chocolate mousse tart that I screwed up and then had the gall to serve to my co-workers knowing that it was going to taste just so (my apologies for that to any of you that are going to or will read this).  


All of this rhubarb madness got me thinking about why rhubarb is so popular as a dessert item.  I mean, it's actually a vegetable. 


I realize it isn't the first vegetable to be integrated within desserts-- which got me thinking more about things like zucchini bread and carrot cake.  


What's the point of adding these otherwise healthy foods into not-so-healthy baked goods?  It doesn't make the baked good any healthier.  


And let's be honest, do we like carrot cake and zucchini bread and strawberry rhubarb pie because these things actually taste like the vegetables that get baked into them?  Well, I kinda don't think so.  I think that as long as we pile a bunch of sugar on top of anything it's eventually going to taste good..  I could pulse and mince up some broccoli and fold it into my chocolate cake batter and I bet it would still taste good as long as I put a lot of sugar in it.  Right?


Well, maybe.  Maybe not.  I've never actually tried that and I could be wrong.  Maybe my cake would taste like broccoli or maybe it would taste just like chocolate cake with some added green "texture".  But what I do know is that I actually might be wrong about all of this because of these hand pies.


Yes yes, these hand pies have a good amount of sugar in them but it doesn't stop the one major characteristic of rhubarb from coming through which is its tartness.  Rhubarb is tart and I think that as long as you don't overwhelm your recipe with sugar--and other spices/ingredients--you can find a great balance and that tart trait can shine through gracefully.  In fact I think you could kick back the sugar amount even more and it would still be an amazing dessert that screamed rhubarb.  There are tons of recipes that always combine it with strawberries--and for good reason--but I think that rhubarb deserves its day in the sun.  These hand pies make the case for rhubarb.  Make them. Savor them. Revel in the tartness that rhubarb embodies.  This is the word of rhubarb.


Recipes

For the pie crust:  

Lately I've gone back to basics with pie crust (for a while I was using the Cooks Illustrated recipe that uses vodka--but the honeymoon is over with that one--it's just too soft to deal with).  So, I've been using a real basic crust which I found on Saveur that has step by step instructions with pictures. You can use any pie crust recipe you wish but just make sure it is enough for what would be a top and bottom crust for a single 9" pie. 

For the filling:

1lb rhubarb stalks with the ends trimmed and cut into half inch slices
3/4c (150g) granulated sugar
2tbsp corn starch
1tsp lemon extract
pinch of salt

-Place the rhubarb, sugar and corn starch into a large bowl and toss it all together until the rhubarb is well coated
-Place the mixture in a medium saucepan and place on the stove over medium-low heat for 15 minutes, covered.  Then remove the cover and cook for another 10-15 minutes on medium heat until it is thick enough so that you can take a spoon and run it along the bottom of the pan and a trench quickly forms and then disappears.
-Remove from the heat and stir in the lemon extract and the salt
-Let cool completely.  Also--courtesy of a tip from Deb at Smitten Kitchen because it is quicker--you can spread the mixture on a plate and place in the freezer until it is cool enough.  It will thicken more as it cools.

To assemble:

1 large egg
1tbsp water
coarse sugar or a cinnamon/sugar mixture (which is what I used) for sprinkling on top

-Preheat the oven to 400 F
-Roll out your chilled pie dough--1 disc at a time--on a well-floured surface--to somewhere between a 1/8-1/4" thick
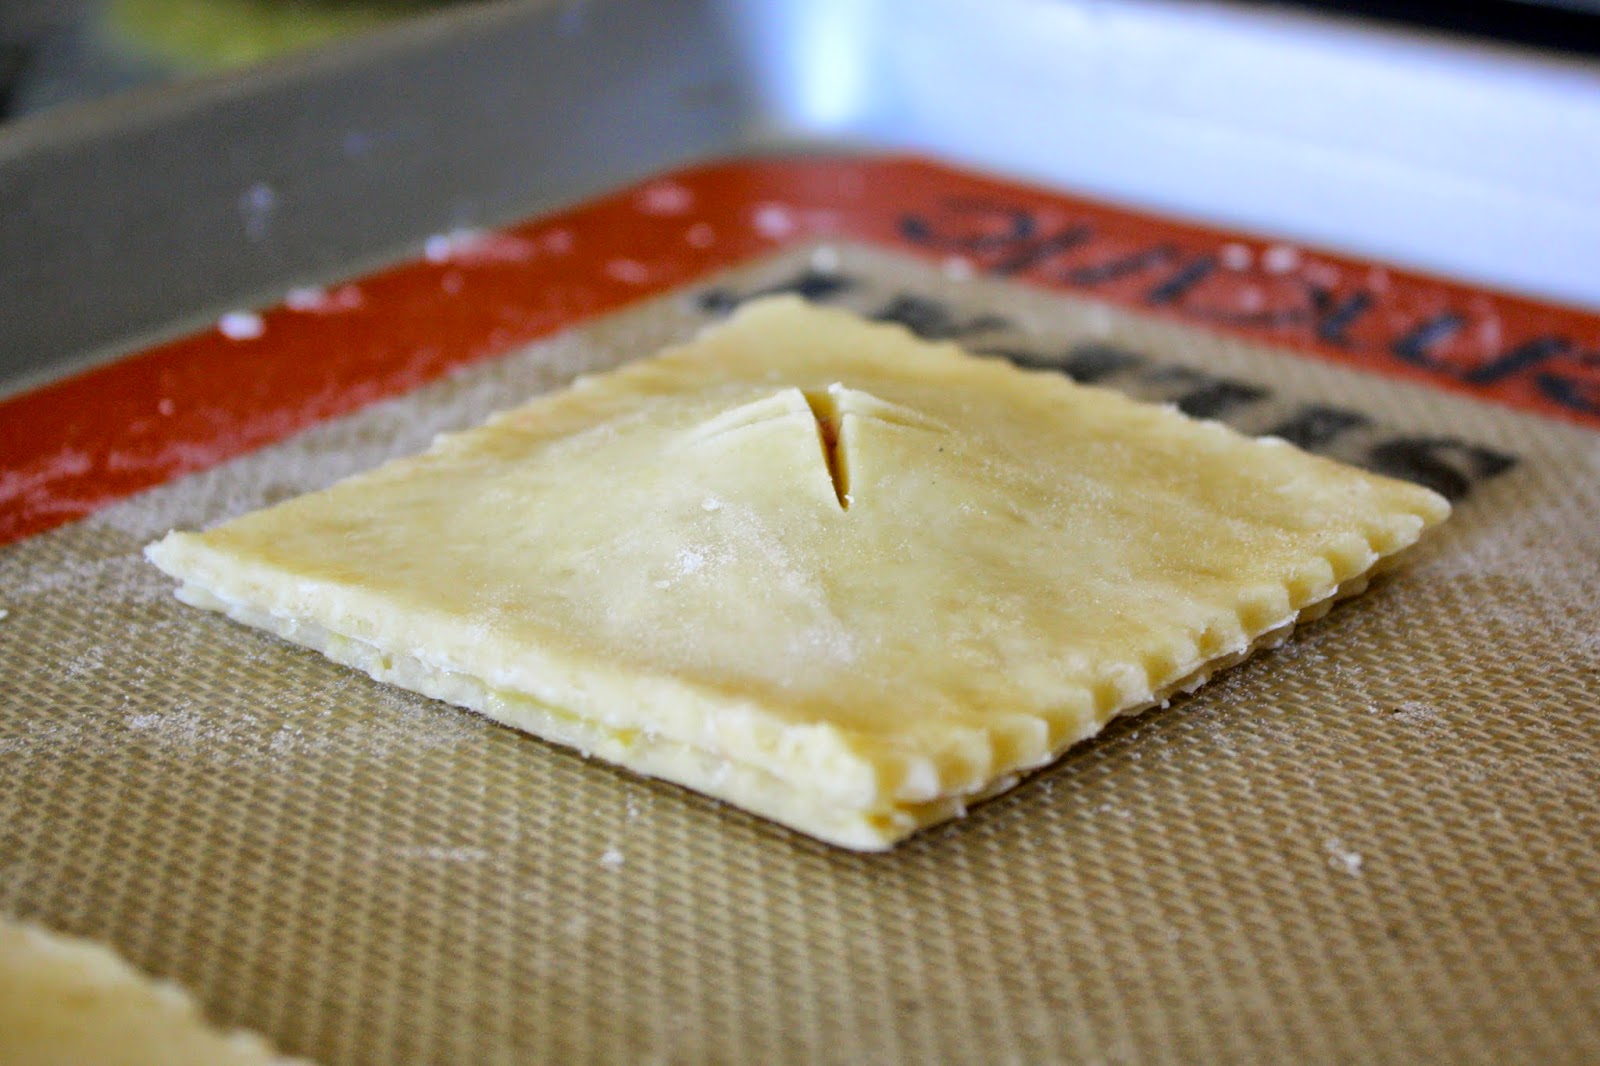
-Using a pastry cutter or a pizza cutter, cut 3x3 inch squares.  You could also probably use a 3" diameter biscuit or cookie cutter as well.  I got somewhere between 15-18 (I made these a week ago so I can't remember now..) hand pies total out of this dough.
-Once you've matched up your squares with a top and a bottom, in a small bowl whisk the egg and water together well and using a pastry brush, brush the bottom of each hand pie with the egg wash
-Spoon about a teaspoon of the mixture (maybe a tiny bit more--my one criticism is that they could have had just a tad more filling) on each of the bottom squares.
-Place the top square over the bottom with the filling and lightly press the edges to seal
-Brush the top square with the egg wash and sprinkle the course sugar on top
-Place pies on a parchment paper or silicon lined baking sheet and bake for 15-20 minutes or until golden brown 
-Remove from the oven and cool or eat warm


Sunday, April 6, 2014

Buttermilk Pie


Spring is slowly--and I stress the word slowly--making its way back into our lives.  This pleases me.  But at the same time I'm a little scared that due to our extreme arctic winter the rhubarb and asparagus are going to be a little late or absent from the party.  I guess there's always Whole Foods... 


Yet, I'm still a little bummed because I bought a couple of new cookbooks with some gift cards I received on Christmas.  By the way, I'm "into" cookbooks now--I wasn't really before.  Normally I scour the internet for recipes and I forget about the many cookbooks that I do have which I think is a misstep on my part.  Cookbooks usually have drool worthy photographs and make nice coffee table pieces.  But they also have some drool worthy recipes.


Anyway...I am a little upset because one of the new books has a chapter for each of the four seasons and although spring is technically here,  most of them are recipes that require spring fruits that aren't.  And I know I could go to the grocery store and buy anything I needed but I have been trying to do all of my produce shopping at the farmers market for the past few years because I think buying locally is a great way to support local farms and businesses.  I also like the idea of using seasonal ingredients as much as possible and shopping at the farmers market is a great way to do just that.  So I do my best to adhere to it.  Pretentious?  Maybe.


But since none of the produce specified in the 'Spring' chapter of this cookbooks is being sold at the farmers market, I did the next most sensible thing which was flipping ahead to the 'Fall' recipes and finding something that didn't require anything I didn't already have on hand.  And what I had on hand was a lot of buttermilk.  A lot of buttermilk that I did not foresee me using for anything else in the near future.  And so in the 'Fall' chapter is a recipe for Buttermilk Pie (why that is considered a Fall dessert is something I don't know but I'll go with it).  I'd never eaten a buttermilk pie and it had a pretty picture so I made it.


The recipe called for some lemon zest and egg yolks along with the buttermilk.  So it actually turned out to be more like a lemon chess pie.  I've never had a lemon chess pie but I've had a chess pie and I imagine that if I combined some lemon and a chess pie this is what it would taste like except the lemon flavor was much more subdued.  Yet, that is the best way to describe it.  It also had a pecan crust which I really hated rolling out but loved the taste.  It was sweet and tasted like a cookie.

This is my filterified night shot!


Pecan Crust:

1c all purpose flour
1/3c pecans
3 tbsp granulated sugar
1/2 tsp salt
4 tbsp cold unsalted butter cut into 1/4" cubes
1 large egg

-In a food processor, combine all of the dry ingredients until the pecans are finely ground
-Add the butter and the egg and pulse just until when pinched it will hold together but does not form a ball
-Drop the dough onto some plastic wrap, form it into a disc, wrap it up tightly and refrigerate for at least an hour
-Roll out the dough on a floured surface, place into a 9" pie plate and trim/fold/crimp excess dough to your liking at the rim of the pie plate.
-Refrigerate dough in pie plate for at least another hour
-After the hour is up, preheat the oven to 400 F
-Line the pie plate with parchment paper and then add some pie weights or dried beans to hold the dough down while blind baking 
-Bake the pie crust for 15 minutes and then remove the parchment paper and pie weights
-Place pie back in the oven for another 10 minutes or until the crust is golden brown
-Remove the pie crust from the oven and reduce the oven temperature to 325 F

*A note about this pie dough:  It tastes great but I found it temperamental to work with/roll out particularly.  It was very sticky and kept coming apart on me so I had to do a little more patching than I would have liked.  So, I would recommend letting the pie crust chill for a lot longer than just 1 hour.  Also I was using my brand new marble rolling pin which may have had a part to play.  Nevertheless I seem to have trouble with pie crust recipes that include an egg anyway so that might have also had something to do with it.

Filling

1 1/4c granulated sugar
3 tbsp corn starch
3 large eggs
6 tbsp unsalted butter melted and cooled
1 1/3c buttermilk
1 tsp grated lemon zest
1/2 freshly grated nutmeg
pecans for garnish (optional)

-Using the food processor again, pulse the sugar and corn starch until combined
-Add everything else and process until well combined
-Pour the mixture into the pie shell and bake for 55 minutes to 1 hour until filling is set and slightly jiggly in the middle
-Remove from oven, let cool and garnish with powdered sugar, pecans or not 
-Serve at room temperature or chilled

*One final note about making the filling:  I used a 9" pie shell and the filling was too much so I couldn't have used all of it or else it would have over-flowed out of the shell.  Also, if you don't have a food processor you could have easily just whisked everything together in a large bowl.  I do have one and used it but it's a medium-sized one--I think-- (I don't know how big... :-/)  but it wasn't big enough so I ended up transferring it to a large bowl and just whisking until everything was well combined.