Wednesday, February 26, 2014

Gâteau Basque


Winter sucks.  This winter sucks big time.  I mean...W.T.Frack?


I'm tired of the unrelenting frigid temperatures, the snow, the ice.  I'm tired of talking about it.  Of hearing about it, of feeling blah every time I look out the window.


I'm also sick of complaining about it.


So about this cake...


Gâteau Basque.  It originates--from what I've read--from the Basque regions of Spain and France--I guess both sides have a version.


I came to know this cake from a cafe/bakery I frequent.  It's Cafe Floriole (check it out--they really make some amazing pastries).  Anyway they make a gâteau basque too and it is my favorite pastry they have.


It comes as a 4" cake dusted with powdered sugar and filled with cherry preserves (usually).  It's decadent and rich.  I mean, normally I can polish off a giant slice of cake all on my own and then some.


I also refuse to share my desserts--that's like sacrilege to me.  But this cake is so rich that I have to share it which is disappointing to me because it has surely been sent down from heaven.  And I'm selfish.  As far as desserts go.

First comes the bottom layer of cake batter...

So, ever since I first tried it I put it on my list of things to get busy with in the kitchen.  And I did.

Then the lemon curd...

About eight months ago when I had an abundance of cherries.

Then the pastry cream with my less than stellar spiral...

 I found a recipe for a gâteau basque.

And finally the top layer of cake batter with an egg wash

I found some different recipes actually--most had cherry preserves and pastry cream nestled in the middle of the cake while others just had the preserves.


I know for sure that the one at Floriole has the preserves but I can't tell whether or not it has pastry cream--I think not but I could be wrong.  Nevertheless, I picked out a recipe and made it as 4" little cakes just using preserves.  The result was good and tasted delectable but it wasn't anything like the ones I knew.  It was more like a pastry (almost pie crust-like) dough than a cake batter.


And the one at Floriole is more like a cake--moist (I'm not afraid of that word) and dense"ish."  So I decided to try again and I finally found a recipe that seemed to have more of a cake batter ratio which was less like the other ones I tried but which also appeared to be more of a better fit.  I just didn't make it until now for some reason--when cherries are far from plentiful in these parts.


Thus I decided to make a slight adaptation and make a Meyer lemon (those are in season somewhere) curd to replace the preserves.  This recipe also included a vanilla pastry cream so I implemented that as well which was a blessed addition indeed.  As a whole this an awesome recipe.  It was really close to the one I have come to love at Floriole.  It was definitely more cakey and had a similar look although I did make it in a 10" (maybe a 9") springform pan instead of the little 4" ones.  The lemon curd replacement was pretty good too I have to say but I'm looking forward to trying it with some cherry preserves. 


I made this into a 2 day process because I needed to make the lemon curd and the pastry cream first.  You could definitely do it all in one day but I was taking my time I suppose.

Lemon curd - recipe from Joy of Cooking

Supposed to make about 1 1/2c which was accurate

3 large eggs
1/3c sugar
grated zest of 1 lemon
1/2c of strained lemon juice (I used Meyer lemons)
6 tbsp of unsalted butter cut into small cubes
1/2 tsp of vanilla extract

-Whisk the eggs, sugar and lemon zest in a medium sauce pan until the color of the eggs is lighter
-Add the lemon juice and the butter
-Over medium heat whisk the ingredients together constantly until the butter has melted and the mixture thickens (So, I believe I removed the mixture from the heat too quickly because it wasn't thick enough when it cooled.  Therefore I had to put it back on the heat until it thickened up more.  But I think I left it on the heat too long because it thickened well enough but once it cooled it had a slightly grainy texture. It didn't effect the overall finished product but the moral of the story is keep the curd on the heat long enough until it is the thickness of a custard)
-Once the curd has thickened, remove it from the heat and stir in the vanilla extract.
-Transfer the curd to a clean bowl and let cool completely.  It should thicken up a bit more as it cools.

Pastry cream - recipe also from Joy of Cooking

Makes about 2c

1/3c sugar
2 tbsp all-purpose flour
2 tbsp corn starch
4 large egg yolks
1 1/3c milk (I used skim)
3/4 tsp of vanilla extract (I used vanilla bean paste)

-Using a stand mixer with the whisk attachment on high speed--mix the sugar, flour, corn starch and egg yolks until thickened and very pale yellow in color
-Heat the milk in a medium saucepan over medium heat until it begins to simmer
-Remove the milk from the heat and pour 1/3 of it into the egg mixture whisking constantly until fully combined
-Pour the egg-milk mixture back into the sauce pan with the rest of the warm milk and place back on the stove over low to medium heat and whisk constantly until it has thickened (whisk constantly else you will risk burning some of the pastry cream) and started bubbling
-Remove the pastry cream from the heat and using a wire mesh strainer, strain it over a clean bowl
-Stir in the vanilla extract
-Place a piece of wax paper directly atop the mixture while it cools

Gâteau Basque adapted from The Travelers Lunchbox

3/4c (90g) almond flour
1 1/3c (200g) all-purpose flour
1 tsp baking powder
1 tsp salt
3 large eggs at room temp.
1c (200g) sugar
1 tbsp vanilla extract or vanilla bean paste
14 tbsp (1 3/4 sticks, 200g) unsalted butter melted
1 egg for an egg wash

-Butter and flour a 10" spring form cake pan and set aside
-Sift the flour, almond flour, baking powder and salt in medium bowl and then whisk together thoroughly
-Using a stand mixer--with the whisk attachment--whisk together the eggs, sugar and vanilla until thickened and pale in color
-Add the melted butter and whisk until combined
-Whisk in the dry ingredients until just combined
-Let the mixture stand for 20 minutes and preheat the oven to 400 F
-After the 20 minutes are up and the oven is preheated, pour half of the cake batter into the spring form pan and smooth and even out with a spatula
-Pour and even out the cooled lemon curd leaving about an inch around the outer edge
-Pipe or just pour and smooth out the cooled pastry cream over the lemon curd
-Pour, smooth and even out the rest of the cake batter and then apply the egg wash to the top of the cake
-Bake for 40-45 minutes until the top is golden brown and a toothpick stuck into the middle of the cake comes out clean
-Remove the cake from the oven and let cool completely before removing from the pan
-Dust some powdered sugar over it if it so pleases you
-Eat




Tuesday, February 4, 2014

Winter Soup


Surprise!  I made something savory again.  Believe it?  No?  Well whatever.  I did.  Nevertheless, I haven't been entirely excited about this post.  In fact I've been less than motivated about writing it.  It wasn't bad at all and as soup goes it was pretty darn good.  But, I'm just not a big soup eater.  Never really have been and I'm not sure why.


Maybe it's because they're never really all that filling for me and you're really just eating liquid.  Eh.  But there are definitely some good soups out there--and chowders too.  I like a thick tomato soup but gag at the thought of a creamy mushroom soup.  No.  Thanks.


But this soup is good, easy and fun to make because there's a good amount of peeling/chopping vegetable prep work and then you just pile it in one pot, cook it, puree it and then you're done.


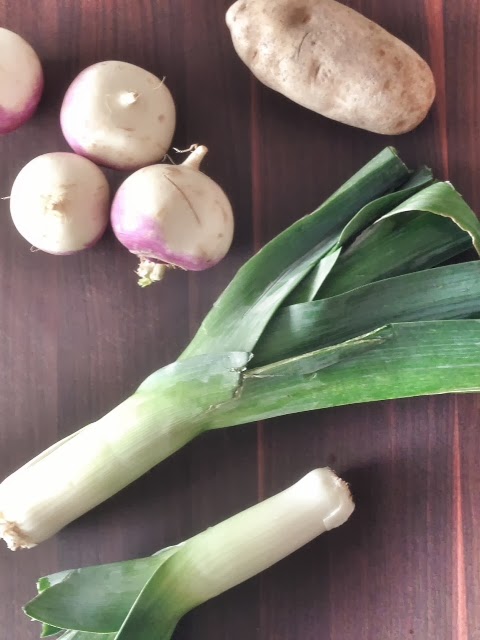
Since it's winter and all that I can get at the farmers market is root vegetables I searched for a winter soup recipe and I found one that was published in the NYT for turnips, leeks and potatoes.


I followed the recipe pretty closely with a few exceptions which were either a result of me not having everything or me liking salty things.


So here goes my slightly adapted recipe from here:

1 tbsp EVO
1 medium onion chopped
2 large leeks halved and then 1/4" sliced (only the white and light green parts)
2 tsps salt
2 garlic cloves minced
1 large russet potato chopped into 1/4-1/2 inch cubes
4 large turnips chopped into 1/4-1/2 inch cubes (recipe calls for 2lbs but I had maybe 1 1/2lbs and it didn't seem to be a problem)
2 quarts of chicken stock
1 bay leaf
4 sprigs of fresh parsley
1/4 tsp ground pepper

4 slices of bacon fried and crumbled for garnish
fresh parsley for garnish

-Heat the olive oil in large dutch oven (at least a 5 quart)
-Add the onion, leeks and a pinch of salt (separate from the 2 tsps listed above) and stir until all soft--about 5 minutes
-Add the garlic and stir in for about 30 seconds
-Add everything else and bring to a full boil uncovered
-Reduce the heat to low, cover the pot and cook for 45 minutes
-Test that the vegetables are tender and soft--try piercing them with a fork and if the fork pierces right through easily they're done.
-Remove the pot from the heat and working in batches spoon the vegetables and some liquid (I didn't incorporate all of the liquid into the final product--I think it just depends on how soupy you want it to be--I wanted my kinda thick so I maybe used only about half of the liquid) into a blender or food processor and puree until completely smooth
-Serve immediately or store in an airtight container for a week at most?  Or freeze it.

When I served it I sprinkled some of the crumbled bacon atop the soup--it was a great addition.


Tuesday, January 21, 2014

Better Nutters


For Christmas this year my sisters gave me Thomas Keller's Bouchon Bakery cookbook.  It's the biggest cookbook I've ever seen.  It could fulfill Kramer's dream and have a dual purpose as a cookbook and a coffee table.  It's mega.  And there are tons of recipes in it--many of which look sort of intimidating because everything in it looks pristine.  Nevertheless, I decided to dive into it with one of his cookie recipes and more specifically his take on the Nutter Better (which is one of the most addicting cookies in human history) which he coined the Better Nutter.  If you've ever been to a Bouchon Bakery you'll notice that all of his cookies--even the renowned macaron--are three times the size of the average cookie.


He makes them big and the Better Nutter is no exception.  Another thing I noticed while flipping through a lot of his recipes is that he pretty much ages all of his doughs--from cookies to scones and probably beyond.  For this cookie recipe and few others I saw he ages the dough in the fridge for a couple of hours at least.  So if you want to make these cookies--like exactly the way he does--you're gonna need some time.  I think that some of the aging (if that's what it even is--I might be using that term incorrectly for this instance) is practical because the dough is a bit sticky and difficult to work with if it's warm which isn't uncommon with some cookie doughs too.  But also, if you've ever made the New York Times cookies they require a day of aging in the fridge before you bake them.  So maybe there's a little bit of flavor enhancement that goes on too. 

The only criticism I have (who am I to criticize Thomas Keller?!) is that I thought the cookies tasted slightly bland.  And the only thing that this recipe doesn't have is salt.  So maybe...maybe...it could use a pinch.  I am not sure that would make a difference but I always read how salt brings out flavor in all things--even sweet.

Here is the recipe for the cookies from Bouchon Bakery by Thomas Keller:

30g (1/4c) unsalted peanut halves (or--in reference to my no salt criticism--use salted peanuts)
198g (1 1/4c + 2 1/2tbsp) all-purpose sifted flour
9.1g (1 3/4tsp + 1/8tsp) baking soda
3.8g (3/4tsp) baking powder
210g unsalted butter at room temp.
86g (1/2c) creamy peanut butter (Bouchon uses Skippy natural peanut butter.  I used Smuckers natural)
106g (1/2c + 1tbsp) light brown sugar
1 large egg
8.5g (1 1/2tsp) vanilla paste (I used vanilla extract)
106g (1 1/2c) old fashioned oats

Peanut butter filling

175g (1c + 3tbsp) of your favorite basic buttercream
175g (1/2c + 3tbsp) of creamy peanut butter
pinch of kosher salt

First toast the peanuts so preheat the oven to 325 F.  Spread the peanuts on a baking pan and toast them for 16-18 minutes.  Remove them from the oven and let cool completely.

-Using a medium bowl, whisk together the sifted flour, baking soda and baking powder.
-Using a stand mixer with a paddle attachment beat the peanut butter and butter together until smooth,  creamy and the mixture holds a peak when you lift the paddle from it.
-Add the sugar to the peanut butter/butter mixture and beat for 2 minutes or until fluffy
-Add the vanilla paste (extract) and egg and mix just until combined--15-30s.  It's noted in the cookbook that over-mixing the eggs can cause too much spreading of the cookies when they are baking and then they will deflate.
-Scrape down the bowl
-Add the dry ingredients in two additions mixing until just combined with each addition.  Scrape down the bowl between additions as well.
-Add the oats and peanuts and pulse mix them about 10 times
-Place the dough into plastic wrap forming a block of dough and wrap tightly.  Refrigerate that for at least 2 hours or until firm.
-After the dough is firm roll it out at about a 1/4 inch thick between two sheets of plastic wrap.  Using a 3" cookie cutter cut out as many rounds as you can.  Scrape up the remaining dough and refrigerate again if too warm for a while.  Then roll it out again and cut out as many more rounds as you can.  I got about 14 total.
-Place all of the rounds on cookie sheets and place in the freezer for another 2 hours or until firm.
-Once the cookies are firm, position the racks in your oven to the top and bottom thirds of it and preheat the oven to 325F
-Make sure the cookies are arranged 2 inches apart on the sheets and bake them for 16-18 minutes rotating the cookie sheets 180 halfway through the baking time.
-Once done baking remove them from the oven, let them sit on the cookies sheets for 10 minutes before removing them and setting them atop cooling racks and then allow them to cool completely.
-Meanwhile, prepare the peanut butter filling by beating together the peanut butter, buttercream and salt in the bowl of a stand mixer until it is good and fluffy.
-Once the cookies are completely cool, pipe the buttercream on one cookie and then place another cookie atop that to make a sandwich.

You should have about 6-7 cookie sandwiches when done.


Sunday, January 12, 2014

Insane Caramel Cake


I was just reading David Lebovitz's new blog post about a white chocolate cake he made.  In the post he mentioned how in the United States we are more accustomed to layer cakes ensconced in frosting.  But in France--and other places in Europe--the cakes are often single layer with some icing or buttercream.  So it reminded me of when we were in Sicily this past Fall and I looked up all of the top pasticceria's in Palermo to visit.  One of the reviewers mentioned a famous seven layer chocolate cake that was housed at one particular pasticceria.  My mouth began watering at the thought of this cake.  Thus, we trekked over there and as I was perusing the glass case of pastries I asked the gentleman manning it if they had a seven layer chocolate cake.  He pointed to something that I took notice of but certainly not because it was what I was looking for.  It was about as tall as a one layer cake and although it looked delicious each layer was only about an 1/8" thick.  My boyfriend tells me that my jaw dropped at the realization that the cake I built up in my head (as a cake that was probably as big as my head) was a petit torte that I could probably down in three bites...

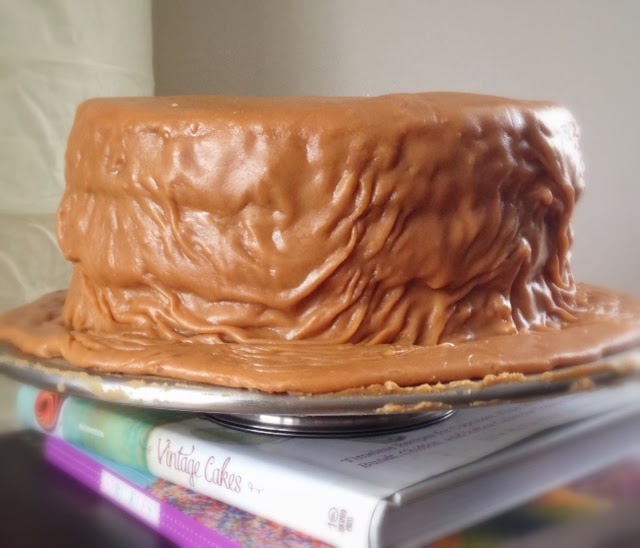
See how the caramel just drapes the whole cake?!
On the other hand this cake here--this insanely decadent caramel cake--is the anti-cake of any cake you would probably find in a French or Italian bakery.  Not only is it composed of three giant layers of yellow cake but, as you can see, it is seriously draped in caramel.


I've been wanting to make this cake for a long time.  It's supposed to be a traditional southern caramel cake and it's got pounds of butter and shortening in it to prove it.  I had read the reviews on it and everyone said it can be kind of challenging because you need to work quickly to make sure the caramel doesn't stiffen up while you put everything together.  Also, there are a lot steps.  I didn't have an issue with this exactly.  What I did realize is that this cake is messy--like really messy.  And if you're looking to make a pretty cake that is beautifully frosted and even then you probably don't want to make this cake.  I mean you pretty much just pour the caramel over the cake and try direct it.  But really it just drips wherever and then you put on the next layer and try to do the same thing over again.

You're gonna need that glass of milk.

Nevertheless, I loved this cake.  Despite it's challenges in putting it together, I think it's fun to make and I would most definitely go another round with it.  The cake itself was awesome, tender and had a great "crumb."  And the caramel...my god...the caramel was something sent down from heaven or something like that.  It was phenomenal.

Here is the recipe.  Read the reviews too--they give some helpful tips.

Make.  This.  Cake!!!


Friday, January 3, 2014

Triple Chocolate Mousse Cake


I saw a picture of this beautiful cake on either Foodgawker or Tastespotting--maybe both--and I was immediately drawn to it.  So I clicked on the link to the food blog it came from and discovered that it was in Russian.  Great....  I mean the pictures were gorgeous but I was a little put off that it was in Russian until I scrolled down a little further to find that it was also in Portuguese...  Oh wait, I don't speak either of those languages.  In fact the two are completely foreign to me.  But I had to make this cake so I used Google Translate.  And I don't know if you've ever used Google Translate but let's just say that once you've translated it into your native tongue you need to go an extra step to translate the translation.  Don't get me wrong, it's an awesome tool and gets the general meaning across but I venture to say that it is less than perfect.

This looks like a Kraft single
Moreover, using it to decipher a recipe is a little tricky.  But at the same time I felt that I had come a long way in my baking expeditions and could muddle through it somehow which is kind of surprising because I had yet to make a mousse of any sort nor a flourless chocolate cake--which if you read down it is divulged as the base for the cake.  Nevertheless, I went through with it and I think it came out fairly well.  I ran into some snags with putting the cake together--mainly trying to get the layers even and pretty looking but I worked through it as best I could.  I messed up with the base cake.  I guess I was supposed to do one thing and I didn't do that thing....and I can't actually blame it on the translation.  My normally super good direction reading skills actually failed me.  But I got through it.  Here's MY translation--or rather my interpretation.

The link to the original recipe is here

Flourless Chocolate Cake:

3 egg yolks
3 egg whites
67 g dark chocolate 75-80%
32 g butter
40g sugar

Dark Chocolate Mousse:

267 g heavy cream
27g sugar
3 egg yolks
214 g cream whipped
8-10 g gelatin sheets
80 g chopped dark chocolate 75-80%

Milk Chocolate Mousse:

267 g heavy cream 
27g sugar
3 egg yolks
214 g cream whipped
8-10 g gelatin sheets
80 g of chopped milk chocolate 

White Chocolate Mousse:

267 g heavy cream 
27g sugar
3 egg yolks
214 g cream whipped
8-10 g gelatin sheets
80 g of chopped white chocolate 

White Chocolate Glaze? (The word did not translate so I think it was just some sort of jellied glaze)

37 g water
75g sugar
75 g light corn syrup
50 g of cold milk
75 g of white chocolate
5-7 g gelatin sheets

 For the flourless chocolate cake:

1.)  Preheat the oven to 350
2.)  Line a jelly roll with parchment paper (this is where I failed to read the directions.  When I finished the cake batter I poured it into the 10" springform pan that I was going to use as the mold for the cake when in reality you were supposed to bake it in a jelly roll pan and cut out a circle to fit into the springform you are using as a mold for the rest of the cake.  The problem with my way was that because I baked it over a smaller surface area the cake was twice the thickness so I had to cut it in half which for this particular cake was not so easy)
3.) Melt the chocolate and the butter in a double boiler and stir to combine.  Remove from the heat and let it cool slightly
4.)  Once it's cooled whisk in the egg yolks one at a time until fully combined.  Set aside
5.) In a separate bowl, whisk the egg whites with the salt until foamy.  Then, add the sugar slowly and continue to whisk the egg whites until stiff peaks form
6.) Gently fold in the egg whites to the chocolate mixture until fully combined.
7.)  Pour the batter onto the prepared baking sheet and smooth out evenly with a spatula.  Bake for 10-12 minutes.
8.)  Remove from heat and let cool while you make the mousse.

For the mousse:  The method is the same for each type of chocolate.

1.)  Soak gelatin sheets in a bowl of cold water
2.)  Place the whisk and bowl that you are going to use to make the whipped cream in the fridge to get nice and cold
3.)   In a medium-large bowl whisk the egg yolks and sugar together until combined.  Set aside.
4.)  Heat the other cream (the 267g one) in a saucepan slowly until it just starts to form bubbles around the edges of the saucepan--to about 167 degrees F
5.)  At that point, remove the sauce pan from the heat and slowly pour about 1/3 of the hot cream into the egg/sugar mixture whisking the whole time until combined.
6.)  Pour the egg/sugar/cream mixture back into the hot sauce pan with the rest of the cream and return to the heat.  Heat--while whisking constantly-- until the mixture begins to thicken up a bit--to about 185 F.  Remove from heat.
7.)  Pour in the chopped chocolate (the type that you are making at this point) and the gelatin sheets (when you remove the gelatin sheets from the cold water, squeeze them out a bit to remove any excess water)  and stir until melted and fully combined.
8.)  Place a fine mesh strainer over a separate clean bowl and strain the mousse over it.  This was an extra step I did because the first time I forgot to temper the egg yolk/sugar mixture and I had little bits of cooked scrambled egg floating around (I know, gross) and the next couple of times I just did it because--either by my own screwing up or otherwise--I still had some coagulated residue at the bottom of the pan.  If you don't feel the need to do this then don't but I think it just helps the mousse set more smoothly as well.
8.)  Set aside the mousse to cool.  Once it's cool, remove the bowl and whisk that were getting all nice and cold from the fridge and whisk the other cream until medium peaks form (I wasn't exactly sure how much to whisk the cream so I just took a guess).
9.)  Pour the whipped cream into the cooled mousse and fold/gently stir until fully combined.

Do this for each type of chocolate.  If you baked the cake in a jelly roll pan, cut out a circle for the size of springform pan you are using (in my case it wold have been a 10" diameter circle) and place it at the bottom of the pan.  Once your first chocolate mousse is done, pour it into your springform pan atop the cake and smooth/even it out.  Set it in the freezer until it's set and firm.  Meanwhile, make the second mousse (for me the first was dark and the second was milk etc.) and once it is ready pour it atop the first one.  Repeat this for the last type of chocolate.  Once you have all of your mousse layers, set them in the fridge/freezer to firm up.

Then, make the glaze:

1.)  Soak the gelatin sheets in a bowl of cold water
2.)  Bring the water, sugar and corn syrup to a boil -- to about 217 degrees F.  Remove from heat.
3.)  Stir in the chocolate and cold milk until fully incorporated.
4.)  Stir in the gelatin (again, wring out any excess water from the gelatin sheets)
5.)  Let the mixture cool a bit and the pour it atop the mousse cake.
6.)  Place the cake in the fridge until the glaze has set.

So, one last thing.  Clearly my cake is a square(ish) form.  That's because when I removed it from the 10" springform pan I wasn't happy with the edges so I cut it up to make it look "neater".  I am not sure how the original baker got her cake to look so beautiful but bravo to her.


Friday, December 27, 2013

Holiday Baking

One of my biggest issues—at least that I tell myself—that I have with keeping up with my blog is that I can’t take good pictures at nighttime.  So if I make something during the week I have to do it after work when it’s already dark.  And then obviously when I go to take pictures of my end product it’s still dark and I miss all of that great daylight that bleeds into my apartment.  I don’t know…  Maybe I’m making a bigger deal out of it than it is but I find it to be an irritating dilemma because I do bake a lot during the week and I want to share those things on my blog.  But because of the not being able to take decent pictures in my apartment with my little ole iPhone at night I usually omit those projects.  Thus, I limit my blog posts to things I make on the weekend which is ok.  I guess. Sort of ok.  Actually, no it’s not.  It’s not ok at all.  I’m still annoyed thinking about all of the things that I’ve excluded just because I can’t take pictures of them in the daylight.

So I’m just going to have to use fancy photo editing effects and stuff.  Until I get better at editing and taking pictures I’m going to muscle through this dilemma.  Yes, I will post more—I will be like a night blogger or something like that.  It will be my “thing”—the niche of my food blog—crappy night time photos!  Well, not crappy but developing and optimistic and photos that endeavor to be daylight photos. 

Anyway, the reason I got to thinking about this (again) is because I baked and confected a lot during this recent holiday season.  I made fudge—which I did blog about—and a cake, chocolates, toffee (twice), cookies, two apple pies, doughnuts and a whole Christmas eve dinner for my parents.  That’s a lot of stuff right?  Too much to just dismiss and pretend like it never happened.  I mean, I was one busy baker.  Well luckily I took some pictures—reluctantly—thinking I might be able to post them and mention them. 

So that’s what this post is—a small amalgam of things I baked over the past couple of weeks. 


Let’s talk about his bundt cake first.  It’s a gingerbread bundt cake that I grabbed from Sprinkle Bakes’ blog with one slight adaptation.   I iced it with a quick chocolate glaze instead of the coffee one cited in the recipe.  Aside from that I followed the recipe to the letter.  It’s turned out great, was very tasty and I didn’t have a complaint about it.  


Now let’s move on to these cookies.  My goal of these cookies was to replicate the Italian bakery style turtle cookies that I fell in love with over the past year.  This is a sugar/butter cookie with caramel, fudge and usually topped with pecans.  I’ve found three bakeries that sell this style cookie and I can’t get enough of them.  So I used an easy spritz cookie recipe from one of my cookbooks, a fudge frosting recipe from a different cookbook of mine and then I kinda made up the caramel concoction myself.  I omitted the pecans that tend to make up a turtle (I think..) but only because I didn’t have any and personally the fudge and caramel are the best parts.  As a whole it was a good cookie but the spritz base wasn’t exactly the right one that I get from a bakery so I’m gonna have to work on that.  I think I’ve found some more authentic recipes so I will definitely come back to this.  The fudge was on target and the caramel was close but I may have to continue to sample some of the real things to prefect it…

From The Art of the Cookie by Shelly Kaldunski:  The spritz cookie

360g all-purpose flour
1/2 tsp salt
185g plus 2 tbsp of butter at room temp.
125g confectioners sugar
1 large egg at room temp.
1 tsp of vanilla extract

In one bowl whisk the flour and salt together.  Set aside
In the bowl of a stand mixer with the paddle attachment beat the butter and sugar together until creamy and light (2-3 minutes)
Add the egg and the vanilla to the sugar-butter mixture and mix until fully incorporated
Slowly add the flour mixture mixing just until the flour is fully incorporated
Drop or pipe the cookie dough onto parchment paper lined baking sheets.  Here, I made about 1 inch diameter round balls of dough and then flattened them out with the tines of a fork (like when making peanut butter cookies).
Place the cookies in the fridge while you preheat the oven to 325
Once the oven is preheated bake the cookies for 15-17 minutes
Remove and let cool.

I made the fudge using the chocolate fudge recipe from my previous post.  The only difference was that at the end I added 1 tbsp of half and half to get the right consistency so I could pipe it onto the cookies.

For the caramel, I made a simple caramel base using this recipe.  Then I just added some powdered sugar until I got the right consistency--not an exact science I know but I need to work on that...

Once I had everything made, I piped on a big dollop of the caramel onto the cookie and on top of that the fudge-- fancy style course.


Lastly were the donuts.  I just used some of the leftover brioche dough that I made weeks ago and froze because the recipe made so much.  The recipe came from Hummingbird High and this time I used the honey glaze that she cites in her post.  The dough froze great and the donuts tasted amazing—especially coming straight out of the fryer.  I think this is a fantastic donut recipe.  Try it.  

Those are my mom's santa salt and pepper shakers--they made for some good props!

Tuesday, December 17, 2013

(Happy Holiday's) Fudge


It's been almost a month since my last post.  Not because I didn't want to post.  No no--that was certainly not the case.  The reason I haven't posted is because I was in Italy!!  Yes, for two weeks my partner, his parents and myself were trekking around the Italian peninsula--from Milan to Sicily--eating and drinking and sightseeing and eating and drinking and eating.  I really enjoyed the eating part.  The patisserie's are basically on every corner so I was in heaven.  It was mega fun but I'm happy to be back mostly because I missed baking.  Maybe that's weird but whatever.


Anyway, you might think my first post back would be some sort of Italian baked good or pastry but I didn't really want to do any of that now.  What I wanted to do was make fudge.  And not just one type of fudge but three types.  I never make fudge but I love it.  This past Memorial Day weekend we went up to Mackinaw Island and bought like a giant box of several types of fudge.  We said we would cut a small piece of each type for ourselves and then give the rest to our co-workers but that never happened.   Those small pieces for ourselves turned out to be the entire brick.  I mean....I really like fudge.  You know?  So that happened.


But this time I couldn't keep all of the fudge for myself.  I promised my sisters that I would send them some so I divided it up evenly and shipped it off.  Of course I sampled it.  I'm not dumb.


The three types I made were peanut butter, salted caramel and chocolate.  The chocolate fudge was a traditional recipe that I took from one of my cookbooks and it was perfect.


It tasted classic--just like the stuff we got in Mackinaw.  The other two types were more of a quick type of fudge that I grabbed from another great blog that looked and sounded beautiful.  They are less intensive and use condensed milk as a base.


So this method of making fudge is amazing and easy and the end product tastes sweet, creamy and bad-ass.  But.  But, I think that I prefer the more classic fudge.  It has the melt-in-your-mouth texture which the other recipes didn't necessarily have.  I think it's also a bit smoother and although it's more of an intensive method to make it's worth the effort.  That said, I would certainly make the other types again and I encourage all to try them.


Recipes:

For the Peanut butter fudge I used this

For the Salted caramel fudge I used this

For the Chocolate fudge I used this recipe from the Joy of the Cooking:

2c sugar
1/8tsp salt
1/2c half-and-half
1/2c heavy cream
1/4c light corn syrup
6oz bittersweet chocolate
2tbsp unsalted butter
1tsp vanilla

Line an 8x8 square pan with parchment paper
Combine the sugar, salt, half-and-half, heavy cream and corn syrup in a large heavy bottom saucepan.
Stir until the sugar is completely dissolved which can take up to five minutes
After the sugar has dissolved, crank up the heat and bring it to a boil or one full minute
Reduce the heat after the minute to low, brush down the sides of the pan with a wet pastry brush and add the chocolate
Stir the chocolate until is completely melted
Once the chocolate is melted, heat the mixture until a candy thermometer registers 234 degrees F.
After the temperature has reached 234, remove it from the heat and place the saucepan in cold water.
Just float on top the butter and the vanilla.  Don't stir it in or apparently you risk making the texture of fudge be grainy.
Let the fudge cool down to 110
Once it has cooled to 110, place the mixture in a bowl of a stand mixer and mix on low until the fudge has lost its sheen which took me about 10 minutes.
Lastly, pour the fudge in the 8x8 square pan and let it set for a few hours
Cut into and enjoy